
If your auxiliary battery drains even though it’s properly connected, it’s almost always an installation mistake or a hidden load — not the battery itself.
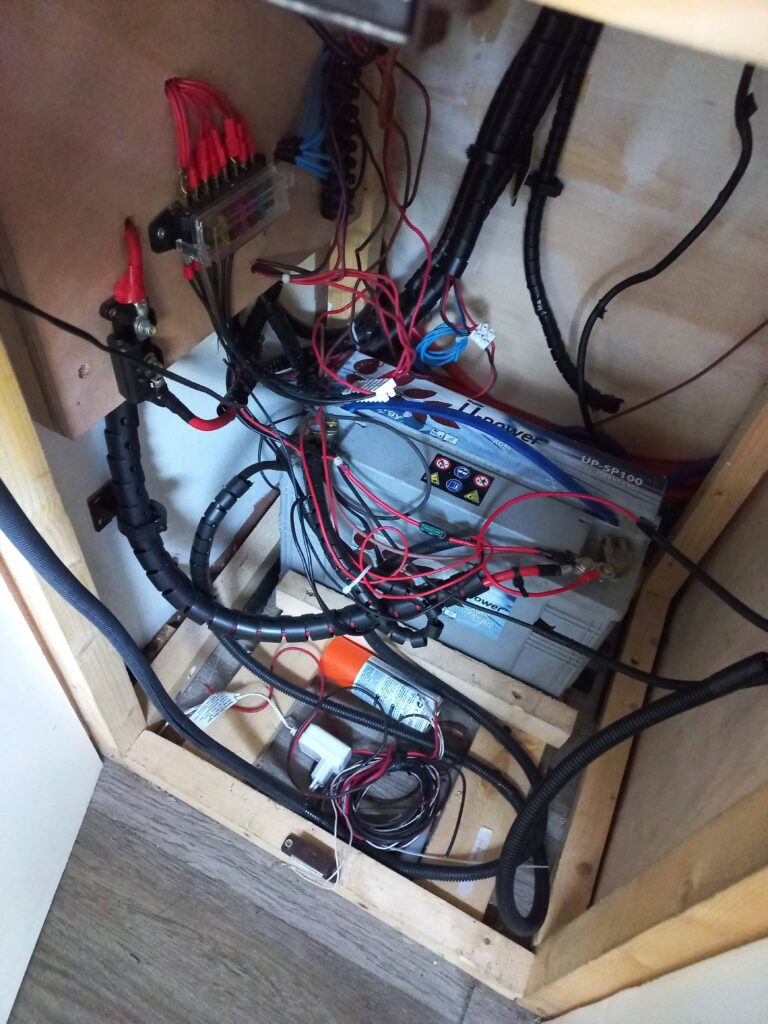
Learning how to wire an auxiliary battery in a camper van without it draining is essential if you want power that’s independent from the engine. Done properly, it lets you run lights, fridge, inverter, and everything else safely and efficiently. Here’s the step-by-step, based on real installation experience.
“I killed a perfectly good AGM running a 230 V fan overnight through an inverter. That’s the kind of mistake this site is built to save you from.”
What an auxiliary (leisure) battery is and what it’s for
The leisure battery separates household consumption from the vehicle’s own systems, so you don’t risk your starting power just by using lights, the pump, or the fridge. It charges while driving, or through solar, and it’s the foundation of any camper build that wants real autonomy and safety. Without one, any 12V use hits the engine battery directly.
The leisure battery powers all of a camper’s household consumption: lights, water pump, fridge, inverter — without touching the engine battery.
What you need for the install
- Battery (AGM or lithium)
- Relay or DC-DC booster
- Fuses
- The right cable gauge
- Terminals and connectors
Each part has a specific job — charging, protecting, distributing energy safely. Cutting corners on any one of them is usually where electrical faults come from later.
The basic wiring layout
The system works like this:
Engine battery → relay/booster → leisure battery → fuses → consumers
This is what lets the leisure battery charge while you drive. The relay or booster acts as the gatekeeper, stopping the engine battery from being drained and making sure the leisure battery only receives power while the engine is actually running.
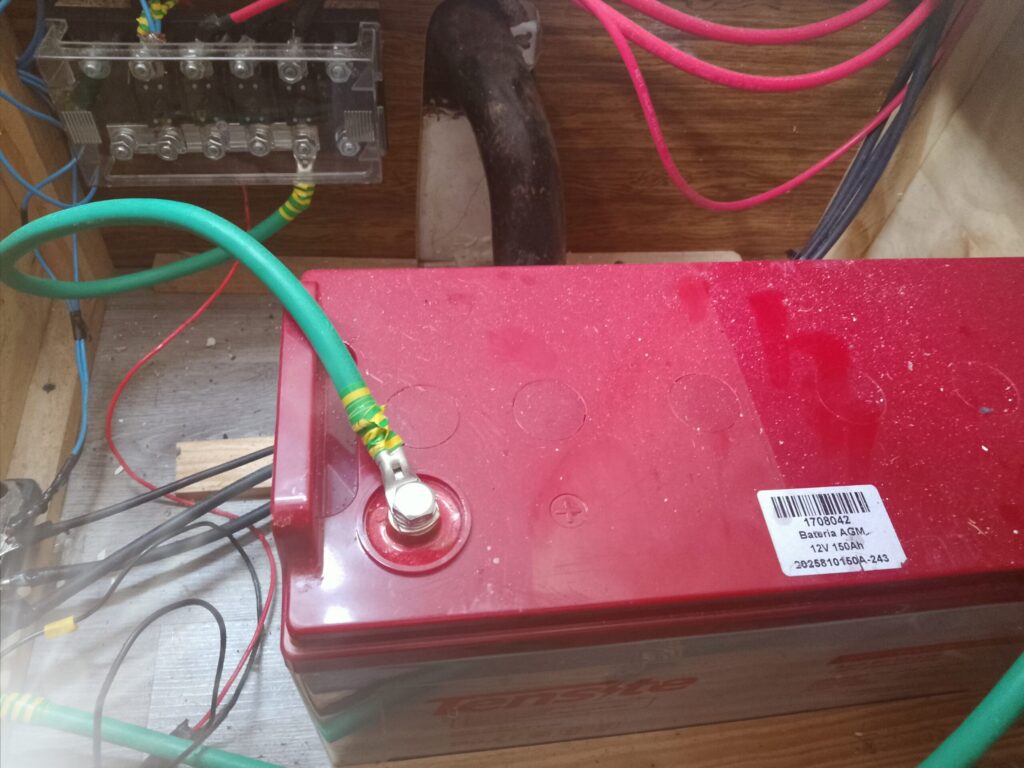
Step by step: wiring the leisure battery
1. Connect the positive from the main battery
- Red cable from the engine battery
- Add a fuse close to the battery
This fuse matters — it protects the whole line in case of a short or a wiring fault. Always double-check positive to positive before connecting anything — getting it wrong can damage your electronics fast.
2. Install the relay or booster
Your options:
- Automatic relay (fine for basic setups)
- DC-DC booster (better for lithium)
The booster regulates the charge and is essential on modern vehicles or with a lithium battery, to avoid charging it incorrectly.
🔌 Relay or booster — how to decide: on an older vehicle with a conventional alternator and a lead-acid battery, a €30 relay does the job fine. From roughly 2015 onward, most vehicles run smart alternators, which drop voltage to 12.3V or lower once the starter battery is topped up — and the leisure battery never gets a full charge as a result.
If you’re going lithium, the booster stops being optional: a discharged lithium battery will pull everything the alternator can give, continuously, which overloads it.
🔌 Relay or booster — how to decide: on an older vehicle with a conventional alternator and a lead-acid battery, a €30 relay does the job fine. From roughly 2015 onward, most vehicles run smart alternators, which drop voltage to 12.3V or lower once the starter battery is topped up — and the leisure battery never gets a full charge as a result.
If you’re going lithium, the booster stops being optional: a discharged lithium battery will pull everything the alternator can give, continuously, which overloads it.
One more thing with lithium: it’s not just the booster that needs to be lithium-compatible — your solar regulator and any mains charger do too. A lithium battery’s BMS expects a specific charge profile, and if it gets a lead-acid profile instead, the BMS will simply cut the charge to protect the cells rather than let it charge wrong. Most modern chargers and regulators have a lithium setting built in — it’s usually just a matter of selecting it, not buying different equipment.
The Renogy 50A comes with a built-in solar MPPT regulator, so it handles both charging sources — alternator and panels — from one device with a single battery profile. Works with AGM, gel, flooded lead, and lithium. This is an affiliate link — if you buy through it I earn a small commission, at no extra cost to you.
3. Connect the leisure battery
- Positive to the system
- Negative to the vehicle’s ground
A good ground connection is what keeps you from voltage drops and hard-to-trace electrical faults.
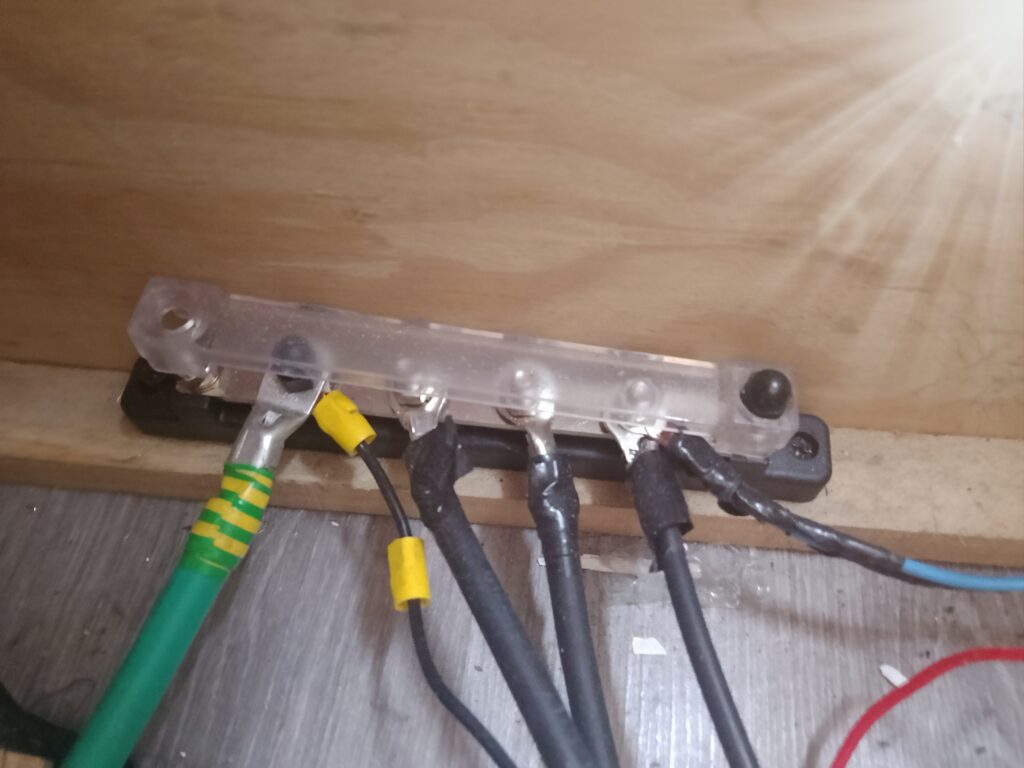
4. Install the fuses
Always on the positive side. Example: battery → fuse → installation.
Each circuit should be protected according to what it actually draws, to avoid damaging equipment or cooking a cable. For where exactly each fuse should go, see where to place fuses in a 12V camper system.
☀️ What about solar panels?
What’s covered above is wiring the leisure battery to the vehicle via relay or booster, to charge it while driving. Solar works as a separate system that also charges the same battery, but through its own solar regulator.
The panel never connects straight to the battery — between panel and battery there always needs to be a solar charge controller, which manages the charge and protects the battery.
Basic order of connection:
- Panel on the roof.
- Panel’s positive and negative to the solar regulator.
- Regulator connected to the leisure battery.
- From the battery, distribution to fuses and consumers.
The cable between the regulator and the battery’s positive side needs to run through a fuse. To size that fuse, check the regulator’s maximum current — for a 20A PWM regulator, for example: maximum regulator current × 1.25 = fuse rating.
One detail that trips people up: connection order. With most regulators, connect the regulator to the battery first, then the panel to the regulator. That lets the regulator detect whether the system is 12V or 24V and charge with the right profile from the start.
In my own case, I mounted the rigid panel on the roof first — it already had two cables with quick-connectors — then fitted the regulator, and with the battery and fuse distribution already in, wired the regulator to the battery side first. Only then did I connect the panel cables to the regulator’s solar input.
Put simply: regulator BAT+ → battery positive (always fused), regulator BAT– → battery negative/ground, regulator PV+ → panel positive, regulator PV– → panel negative. Don’t reverse polarity, and always check your specific regulator’s manual — but as a general rule, battery to regulator first, then panel to regulator.
Most common mistakes when wiring a leisure battery
- No fuse: one of the most dangerous mistakes there is — without fuse protection, any fault can damage the install or start a fire.
- Cable that’s too thin: undersized cable causes losses and can overheat. See what cable gauge to actually use.
- Bad ground connections: a poor ground makes the battery charge badly or drain unexpectedly.
- No relay or booster: wiring both batteries straight together risks draining one into the other — very common on badly done installs.
- Hidden loads (inverter, etc.): some devices, like the inverter, can draw power even when you’re not actively using them.
If you’ve checked all of this and it still looks right, the issue might be the battery itself. See the real differences between AGM and lithium and which one I use.
🔴 Why a leisure battery drains even when it’s wired correctly
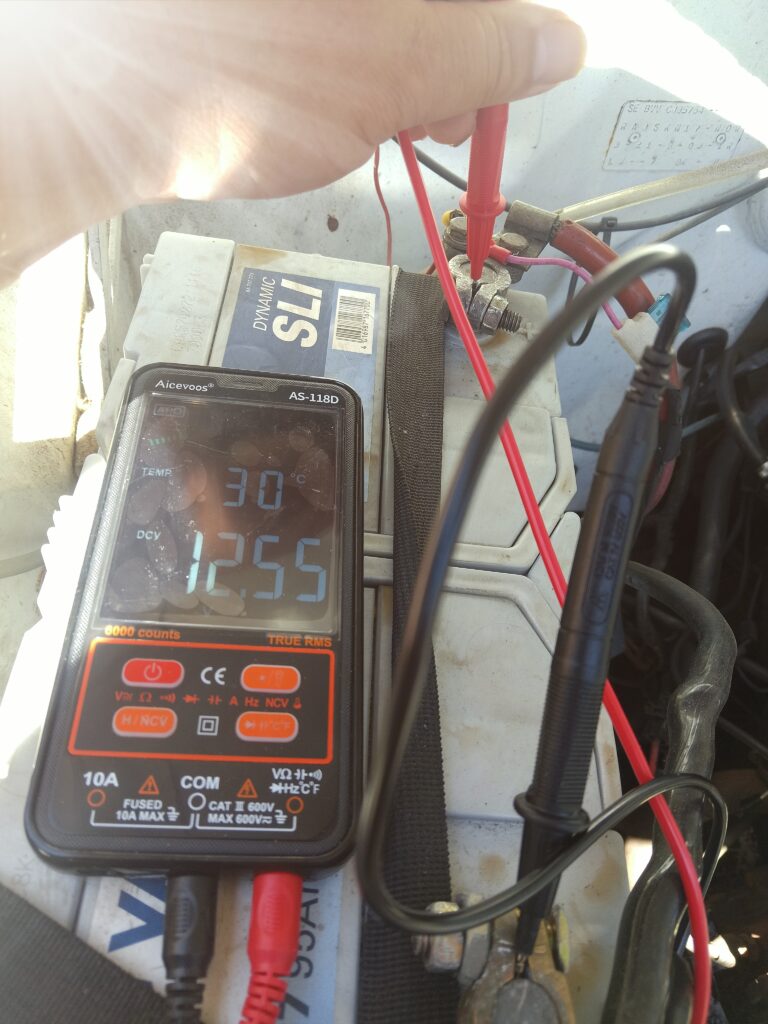
One of the most common issues in a camper install: everything looks properly connected, but the leisure battery still drains on its own, or won’t hold a charge. In reality, most faults aren’t in the components themselves but in how the install was put together — a poor ground, cable with too much voltage drop, or a misconfigured relay/booster. I cover these causes in detail, including how to check each one yourself with a multimeter, in why the leisure battery isn’t charging from the alternator.
What cable to use (this one matters)
| Load | Recommended gauge |
|---|---|
| Lights | 1.5 mm² |
| Pump | 2.5 mm² |
| Inverter | 25–50 mm² |
How I actually sized mine: I did the standard calculation — cable gauge based on the distance run and the amperage each circuit needs, using a wire gauge table for the independent circuits. But for the main run from the battery to the inverter, I sized it around the inverter’s actual power draw plus a safety margin well over 30%, not just a flat 30%, because induction motors can pull roughly five times their running current on startup — that surge is what you’re sizing the cable for, not just the steady-state draw. That run came out to 25–30mm². The battery-to-fuse-box run is very short in my install, and I used the same 25–30mm² there too. From the fuse box, each independent circuit then gets its own gauge based on what that specific circuit actually draws — you’re really adding up the loads circuit by circuit, not applying one number to the whole install.
Concretely, with a 1,000W inverter about 1.5m from the fuses (which sit right next to the battery), 25mm² copper works out to about 1.46% voltage drop under normal load, and still only around 2.19% even sized for the inverter’s surge plus my safety margin — comfortably under the usual 3% threshold. On top of the inverter, I also built in a bit of extra margin in that calculation for a 12V circuit I didn’t have yet: my old motorhome originally only had a 220V hookup, no 12V sockets anywhere. I sized the feed with a small allowance in mind for something like a fan or a phone charger later, even though at the time I installed it, nothing 12V was actually connected.
When in doubt, oversize rather than undersize.
Practical tip: use busbars or distribution blocks to keep the install organized — clean, safe connections instead of improvised splices, and much easier to review or expand later.
🔩 A busbar saves you half your headaches. The classic mistake is stacking five terminals on the same battery post — vibration works them loose, they heat up, and you get intermittent faults that take forever to trace later. A distribution block gives you one thick cable to the post and everything else neatly distributed and accessible. Affiliate link — small commission if you buy through it, no extra cost to you.
One thing worth knowing if you’re in Spain: this can end up on your paperwork
In my own case, my Transit’s ITV paperwork (the official vehicle inspection record) lists the camper conversion modifications by name — including the AGM battery model, the skylight dimensions, the window, the heater. If you’re doing a full legal camper conversion in Spain, the battery you install isn’t necessarily just a private choice: it can show up on record as part of the approved modifications. Check with whoever handles your conversion’s paperwork before assuming it’s a detail nobody will ever ask about.
Conclusion
Wiring a leisure battery in a camper isn’t complicated if you follow the right structure: protection (fuses), proper wiring, and a charging system that matches the battery. Most electrical problems don’t come from the components — they come from how the install was put together. Get that right from the start and you’ll have a reliable system that’s easy to expand later.
Components used in this install
| Component | Product | What it does |
|---|---|---|
| 🔌 Charge relay | VEVOR 12V voltage-sensitive relay kit | Connects the leisure battery to the main one, charging while driving without drain risk |
| ⚡ ANL fuse holder | 100A ANL fuse holder kit | Protects the install from overload and short circuits — essential on any leisure setup |
| 🔴 Battery cable | 25mm² M8 flexible silicone cable | Rated for installs up to 100A — flexible, heat-resistant, easy to route |
These are affiliate links — small commission if you buy through them, no extra cost to you. Before buying a fuse holder, check the listing to see whether the fuse itself is included — this varies by seller.
🔋 Battery still losing charge despite a correct install? See the most common causes in why a camper battery drains on its own.
FAQ
Can you connect a leisure battery straight to the starter battery?
Not recommended without something separating and controlling the charge. Standard practice is an automatic relay or a DC-DC booster, so household use doesn’t drain the starter battery.
Is a relay or a booster better for charging the leisure battery?
Depends on the vehicle and battery type. A relay can work fine on an older vehicle with a conventional alternator; a booster suits smart alternators or lithium batteries much better, since it controls voltage and charging more precisely.
Where should the fuses go between the two batteries?
The positive cable should be protected as close as possible to each power source. When a cable connects two batteries, it’s normal to fuse near each positive terminal, since either battery could supply current during a short.
What cable gauge do I need for the leisure battery?
Depends on the maximum current, total cable run, and the voltage drop you’re willing to accept. Higher current or longer runs need a thicker cable. Follow the relay or booster manufacturer’s recommendation.
Why does the leisure battery drain even when it’s wired correctly?
Could be a hidden load, an inverter left on, a worn-out battery, a bad connection, or a charging system that just can’t fully recover it. Measure standby draw and test solar and alternator charging separately.
Can the leisure battery charge from both solar and the alternator?
Yes. Both can charge the same battery as long as each uses its own regulator and everything is configured for the battery type you’ve installed.
[…] Before swapping the battery out, make sure the problem is actually the battery and not somewhere else in the electrical system. Plenty of “worn out” batteries are simply undersized for the actual load, or are suffering from a charging problem upstream. If you haven’t already, it’s worth wiring things correctly from the start — see how to wire an auxiliary battery in a camper van. […]
[…] My takeaway from both experiences: for very occasional use, a small inverter might look sufficient, but if you want a stable setup with real margin, it’s worth installing a properly sized pure sine wave inverter, with good wiring, the right fuse, and a battery that can actually sustain it. I go into the exact voltage-drop math behind my own inverter cable run — 25mm² over about 1.5m — in how to wire an auxiliary battery in a camper van. […]
[…] ¿Prefieres verlo en inglés? Aquí tienes la guía equivalente sobre cómo conectar una batería auxiliar: How to Wire an Auxiliary Battery in a Camper Van (Without It Draining) → […]
[…] How to Wire an Auxiliary Battery in a Camper Van […]
[…] If you want to see the whole system, including controllers, battery, inverter and protections, I explain it in how to wire an auxiliary battery in a camper van. […]