
You can size every fuse in your camper perfectly and still get this wrong. The size protects against overcurrent — but where you physically install each fuse determines how much of your wiring is actually protected, and whether you can reach it when something fails. Both matter, and most guides only cover the first one. If your fuse is already blowing repeatedly and you’re trying to figure out why, that’s a related but separate question — see Why Does the Fuse Keep Blowing in My Camper’s 12V System? for the diagnostic side. This guide covers where each fuse belongs in the first place.
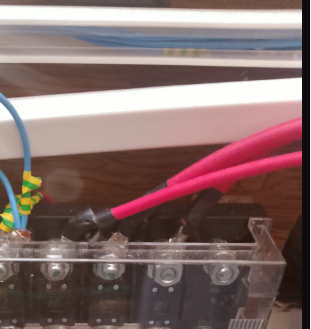
The Core Rule: As Close to the Source as Possible
Every fuse should sit as close as possible to the power source it’s protecting — almost always the battery or busbar side of the circuit, not the appliance side. The reason is simple: any stretch of cable between the source and the fuse is completely unprotected. If a short develops in that unprotected section, nothing stops it. The closer the fuse sits to the source, the less cable is ever left exposed.
This is easy to grasp for a single main fuse between battery and busbar. It’s less obvious — and more often ignored — when you’re wiring individual circuits off a distribution fuse box.
Applying It Circuit by Circuit
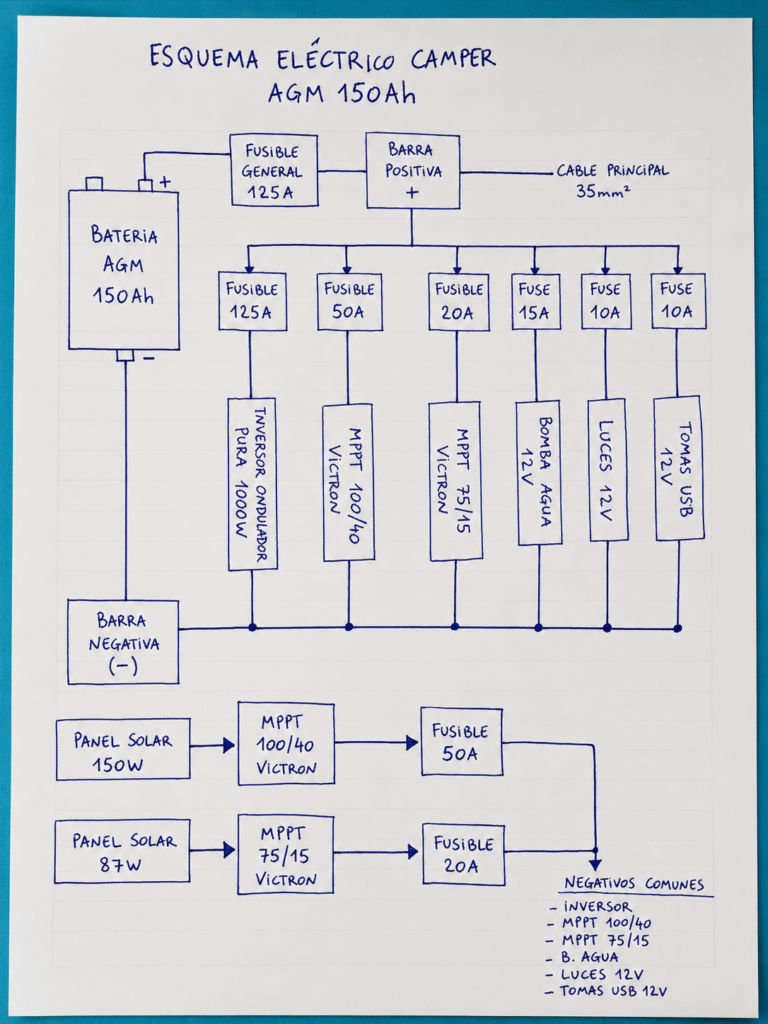
The same rule applies to every branch circuit, not just the main feed:
Main battery fuse. This one is non-negotiable: install it directly at (or within a few inches of) the battery’s positive terminal, before the cable goes anywhere else. This is the fuse that protects your entire system’s main feed cable.
Inverter/high-current circuit. The fuse belongs right at the battery or busbar side of the inverter cable — not tucked next to the inverter itself. If you’re sizing this one, see the companion guide on fuse size for inverters.
Lighting, fan, and USB circuits. These typically run from a central fuse box, so the “source” for each of these circuits is the fuse box itself, not the battery. Each individual light or fan circuit should be fused right at the fuse box, at the point where that branch leaves the distribution point — not somewhere further down the run.
Water pump. Same principle: fuse it at the distribution point, as close to the fuse box or busbar as the physical layout allows, not at the pump end of a long cable run.
Fridge and heater circuits. These often draw more current and run longer distances than lighting circuits. Fuse them at the source side, and if the run is long, double-check the cable is sized for the full distance — a correctly placed fuse can’t compensate for a cable that’s too thin for the run length.
The pattern across all of these: the “source” isn’t always the battery directly — for branch circuits, it’s the busbar or fuse box that circuit originates from. Wherever current enters a new stretch of cable, that’s where the fuse belongs.
If you’re not sure what size fuse the inverter circuit needs, see the full guide on fuse size between battery and inverter.
Accessibility Matters as Much as Placement
Getting the fuse close to the source protects the cable — but it doesn’t help you at all if you can’t actually reach the fuse when something goes wrong. I learned this the hard way on a vehicle, not the van itself: the fuse box was located under a seat that normally opened electrically with a button. When a fuse blew — possibly, as best as I recall, even the one feeding the seat’s own opening mechanism — I was left stuck until I could work through every fuse to find the culprit.
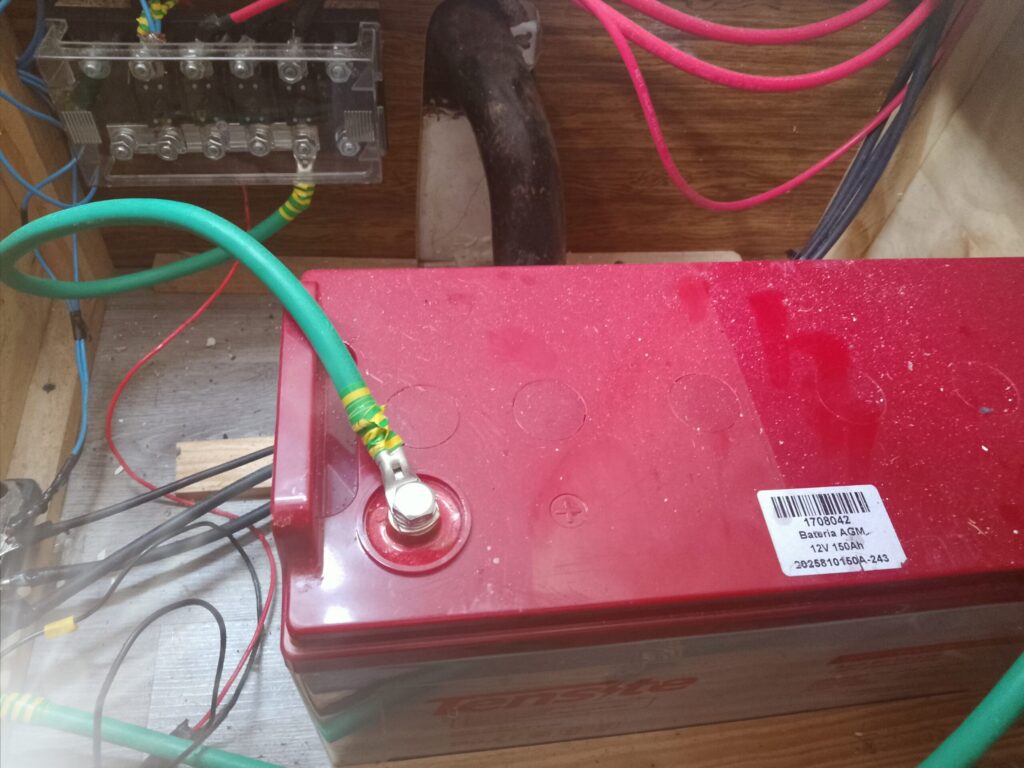
Here’s the part that really drove the lesson home: the manufacturer had thought of this and included a manual backup — a physical key and lock cylinder to open the seat by hand if the electric button ever failed. Smart design, in theory. But when I later had a proximity key copied at a shop and they replaced that manual lock and key as part of the job, the new key never worked — not once, from day one. Since the shop was far away and I never got around to going back to sort it out, time passed, and to this day I just leave the seat semi-open as a workaround. Why? Because the battery is located under that same seat — so if it ever goes flat, I’d have no electrical power to open the seat electrically, no working manual backup either, and therefore no way to reach the battery to jump-start or replace it. A complete lockout, by design, just waiting to happen.
That experience is exactly why, when I laid out the electrical panel in my own camper, I made one rule non-negotiable: nothing that protects or powers the system — the fuse box, the battery, the isolator switch — sits behind anything that itself needs electricity, a code, or a mechanism to open. Everything is reachable by hand, in the dark, with the system completely dead, because I already know firsthand what it feels like to be locked out of the one thing that would let you fix the lockout.
If you’re still planning your layout, this is the moment to apply that same rule: a manual backup isn’t worth anything unless you’ve actually tested that it works — right now, not “in theory.” And if your fuse box or battery isolator sits somewhere that depends on power to reach — behind an electrically-locked panel, under a bed platform you need tools to lift — you’ve created a scenario where a single failure can lock you out of fixing itself. Test your manual overrides today, before you need them in an emergency.
Vibration and Moisture Change Where a Fuse Should Go
Placement isn’t just about reaching the fuse later — it’s about what the location does to it over time. I had a charge controller terminal melt from road vibration alone: nothing was overloaded, the connection just worked itself loose a fraction of a millimeter at a time until resistance built up and it cooked. Mount fuses and fuse blocks somewhere that doesn’t flex with the chassis, away from anywhere water tends to collect, and check the terminals for looseness every few months — vibration doesn’t announce itself the way an overload does.
Always Carry the Vehicle’s Wiring Diagram
One more practical habit worth adopting: keep your vehicle or van’s electrical diagram and fuse chart with you, physically or as a photo on your phone. I recall running into a fuse box that was missing labels — or possibly missing fuses in some positions entirely — which made it genuinely confusing to tell whether an empty slot was normal or the actual source of the fault. Without a reference diagram, it’s easy to chase the wrong lead simply because you can’t tell what should be there in the first place.
Common Mistakes to Avoid
Installing the fuse near the appliance instead of near the source, leaving a long stretch of unprotected cable in between.
- Assuming a manual backup for accessing the fuse box or battery works without ever actually testing it.
- Placing the fuse box somewhere that itself requires power to reach (behind an electric panel, under a bed that needs tools to lift).
- Not keeping any wiring diagram or fuse chart on hand, making it hard to tell a missing/unlabeled fuse from a genuine fault.
Fusing a whole branch circuit at one point while ignoring that each individual sub-circuit off a distribution box needs its own fuse at the point it leaves that box.
A fuse only protects against overcurrent — it won’t save you from a cable that’s too thin for the load in the first place. If you’re not sure your wiring is sized correctly, see the full guide on undersized wire.
The One Rule That Isn’t Flexible: Distance From the Battery
The first fuse in the chain has one placement rule that isn’t optional: it needs to sit within about 7 inches (18 cm) of the battery’s positive terminal, no matter how far the rest of your wiring runs. That short stretch of unfused cable between the battery and the fuse is the one piece of wire in your whole system that isn’t protected — keep it as short as physically possible. Everything downstream of that first fuse can be placed for convenience; that first one can’t.
Matching Fuse Type to Location
Where a fuse goes is only half the decision — what kind of fuse belongs there is the other half, and the two are directly connected. High-current points near the battery need a fuse built to bolt onto a terminal and handle sustained heavy load; low-current branch circuits need something cheap, compact, and easy to swap on the side of the road.
| Location | Typical fuse type | Typical current range | Why this type |
|---|---|---|---|
| Battery main terminal | ANL, MRBF, or Class T | 100–400A | Bolt-on design for a direct terminal connection; rated to handle high DC fault currents without failing to interrupt |
| Battery-to-inverter run | ANL or Class T | 100–400A | Tolerates the brief startup surge of inverter loads without nuisance tripping, while still protecting against a genuine short |
| Battery-to-busbar main feed | MEGA or ANL | 40–150A | Protects the single cable carrying the combined load of every branch circuit downstream |
| Fuse box branch circuits (lights, fans, USB) | Blade (ATO/ATC) or Mini blade | 1–30A | Inexpensive, colour-coded, and quick to identify and replace — appropriate for the low current these circuits draw |
| Water pump / fridge circuit | Blade (ATO/ATC) or Maxi blade | 5–30A | Mid-range current still fits a standard distribution fuse box |
| Heater circuit | Blade or Maxi blade | 10–30A | Depends on the specific heater’s draw — check the manufacturer’s spec before assuming a rating |
If you’re deciding between ANL and Class T for a high-current point specifically, that’s covered in more depth in the fuse sizing guide for inverters.
When the Ideal Isn’t Possible: Practical Exceptions
The “as close as possible” rule is the goal, not always a rigid requirement you can hit perfectly in a real van layout. A few situations where it’s worth knowing the trade-offs instead of forcing it:
A very long run to a distant high-draw device. If a device sits far from the battery — a rear-mounted heater in a long-wheelbase van, for example — fusing only at the battery end still leaves a long stretch of cable that, while technically “protected,” is a lot of exposed length for a fault to develop in. In this case it’s worth considering a secondary local fuse or breaker close to the device as well, effectively treating that run as its own mini source-to-load circuit rather than relying on one distant fuse to do all the work.
Combined battery and distribution enclosures. Some builds keep the battery, busbars, and fuse box all in the same compartment. When that’s the case, “close to the source” and “close to the distribution point” are the same physical spot — which is the easiest scenario to get right, since there’s no long run to protect in the first place.
Devices with their own internal fuse. Many inverters and some pumps already include an internal fuse as a last line of defense. That’s not a substitute for fusing the external cable correctly — it protects the device’s internals, not your van’s wiring — but it’s worth knowing it’s there so you don’t mistake a blown internal fuse for a wiring fault, or vice versa.
### Matching Fuse Type to Location
Where a fuse goes is only half the decision — what kind of fuse belongs there is the other half, and the two are directly connected. High-current points near the battery need a fuse built to bolt onto a terminal and handle sustained heavy load; low-current branch circuits need something cheap, compact, and easy to swap on the side of the road.
| Location | Typical fuse type | Typical current range | Why this type |
|---|---|---|---|
| Battery main terminal | ANL, MRBF, or Class T | 100–400A | Bolt-on design for a direct terminal connection; rated to handle high DC fault currents without failing to interrupt |
| Battery-to-inverter run | ANL or Class T | 100–400A | Tolerates the brief startup surge of inverter loads without nuisance tripping, while still protecting against a genuine short |
| Battery-to-busbar main feed | MEGA or ANL | 40–150A | Protects the single cable carrying the combined load of every branch circuit downstream |
| Fuse box branch circuits (lights, fans, USB) | Blade (ATO/ATC) or Mini blade | 1–30A | Inexpensive, colour-coded, and quick to identify and replace — appropriate for the low current these circuits draw |
| Water pump / fridge circuit | Blade (ATO/ATC) or Maxi blade | 5–30A | Mid-range current still fits a standard distribution fuse box |
| Heater circuit | Blade or Maxi blade | 10–30A | Depends on the specific heater’s draw — check the manufacturer’s spec before assuming a rating |
If you’re deciding between ANL and Class T for a high-current point specifically, that’s covered in more depth in the fuse sizing guide for inverters.
### When the Ideal Isn’t Possible: Practical Exceptions
The “as close as possible” rule is the goal, not always a rigid requirement you can hit perfectly in a real van layout. A few situations where it’s worth knowing the trade-offs instead of forcing it:
A very long run to a distant high-draw device. If a device sits far from the battery — a rear-mounted heater in a long-wheelbase van, for example — fusing only at the battery end still leaves a long stretch of cable that, while technically “protected,” is a lot of exposed length for a fault to develop in. In this case it’s worth considering a secondary local fuse or breaker close to the device as well, effectively treating that run as its own mini source-to-load circuit rather than relying on one distant fuse to do all the work.
Combined battery and distribution enclosures. Some builds keep the battery, busbars, and fuse box all in the same compartment. When that’s the case, “close to the source” and “close to the distribution point” are the same physical spot — which is the easiest scenario to get right, since there’s no long run to protect in the first place.
Devices with their own internal fuse. Many inverters and some pumps already include an internal fuse as a last line of defense. That’s not a substitute for fusing the external cable correctly — it protects the device’s internals, not your van’s wiring — but it’s worth knowing it’s there so you don’t mistake a blown internal fuse for a wiring fault, or vice versa.
faq
Does the fuse always have to be right next to the battery?
For the main battery fuse, yes — as close as physically possible. For branch circuits off a fuse box or busbar, the “source” is that distribution point, not the battery itself, so the fuse belongs right there instead.
What if I can’t physically get the fuse close to the source because of the van’s layout?
Get as close as reasonably possible, and if there’s no way to avoid a longer unprotected run, that section of cable needs to be extra well protected — properly secured, chafe-protected, and ideally routed away from anything it could short against.
Is a fuse box that’s hard to access ever acceptable?
Only if you have a genuinely tested, reliable way to reach it in an emergency — and “genuinely tested” means you’ve actually opened it that way yourself, not just assumed the backup mechanism works.
Do I need to fuse the negative (ground) wire too, or just the positive?
In almost every 12V camper setup, only the positive side is fused. The negative/ground side is bonded to a common busbar and doesn’t need individual fusing — fusing both would add complexity without a real safety benefit in a standard setup, and is typically reserved for specific isolation requirements rather than everyday circuits.
Can I use one large fuse to cover several small circuits instead of fusing each one separately?
You can size a single fuse for the combined load of several circuits sharing one cable run up to the distribution point — but once they split into individual circuits at the fuse box, each one still needs its own fuse sized for that specific circuit, not the combined total.
How far is “too far” for a fuse to be from the source?
There’s no universal number — it depends on how much unprotected cable you’re comfortable leaving exposed and how well that section is secured and protected from chafing or contact with metal. As a practical target, get it within the first foot or so of the source whenever the layout allows, and treat anything longer as a case to double-check rather than a default.
Why Does the Fuse Keep Blowing in My Camper’s 12V System?
Reverse Polarity: Risks and How to Fix It
[…] Each circuit should be protected according to what it actually draws, to avoid damaging equipment or cooking a cable. For where exactly each fuse should go, see where to place fuses in a 12V camper system. […]
[…] For high power, ANL, MIDI, or MEGA fuses are the usual choice depending on the install and amperage. The fuse holder matters too — a cheap, loose, or poor-contact fuse holder can generate heat and voltage drop on its own. For where each fuse in your system should actually sit, see where to place fuses in a 12V camper electrical system. […]
[…] ¿Prefieres verlo en inglés? Aquí tienes la guía equivalente sobre dónde colocar los fusibles en la instalación: Where to Place Fuses in a 12V Camper Electrical System → […]
[…] Where to place fuses in a 12V camper system […]
[…] If you work on the installation often, a properly sized fuse close to the battery is the first line of defence. I explain it in detail in where to place fuses in a 12V camper electrical system. […]