
Choosing the right cable for a camper inverter matters as much as choosing the inverter itself. You can buy a great pure sine wave inverter, a large battery, and the right fuse — but if the cable between battery and inverter is too thin or too long, the installation will give you problems.
“I killed a perfectly good AGM running a 230 V fan overnight through an inverter. That’s the kind of mistake this site is built to save you from.”
Common failures from getting this wrong:
- The inverter beeps and shuts down
- The cable heats up
- The fuse blows
- The battery seems discharged even though it isn’t
- Voltage drops when you connect heavy loads
- The inverter can’t deliver the power it’s rated for
In a 12V camper installation, the inverter is one of the components that pulls the most current from the battery. That’s why it isn’t enough to just look at the inverter’s wattage — you also need to work out the amps it will draw, the cable distance, and the right fuse.
Why the inverter cable matters so much
An inverter converts 12V DC from the battery into 230V AC so you can run chargers, tools, a coffee maker, a blender, or small appliances. The problem: delivering high power from a 12V battery takes a lot of amps.
For example:
- 1000W ÷ 12V = 83A
- 1500W ÷ 12V = 125A
- 2000W ÷ 12V = 166A
And that’s before accounting for inverter losses — in practice, real current draw can be somewhat higher. A 2000W inverter can easily pull close to 180A or more at peak load.
That much current can’t pass through just any cable. A cable that’s too thin, too long, or poorly connected causes three problems: voltage loss, heating, and electrical risk.
The most common mistake when installing an inverter
The most common mistake is thinking only about the inverter’s wattage and forgetting the wiring. Plenty of people buy a 1000W or 2000W inverter, connect it with whatever cable came in the box or was on hand, and then run into problems.
The inverter usually isn’t shutting down because it’s faulty — it’s shutting down because it’s receiving less voltage than it needs and entering its own protection mode. This happens especially when:
- The inverter is far from the battery
- The cable is too thin
- Terminals are poorly crimped
- The fuse or fuse holder can’t handle the current well
- The battery can’t deliver that many amps
- There’s significant voltage drop along the run
Quick reference table: what cable to use for a camper inverter
This table is a guideline for 12V camper installations with short runs between battery and inverter.
| Inverter power | Approx. 12V draw | Recommended gauge | Indicative fuse |
|---|---|---|---|
| 300W | 25–30A | 6–10 mm² (~8–6 AWG) | 40A |
| 600W | 50–60A | 16 mm² (~5 AWG) | 60–80A |
| 1000W | 90–100A | 25 mm² (~3 AWG) | 100–125A |
| 1500W | 130–150A | 35 mm² (~2 AWG) | 150–175A |
| 2000W | 170–200A | 50 mm² (~1/0 AWG) | 200–250A |
| 3000W | 250–300A | 70 mm² or more (~2/0 AWG+) | 300A or more |
Important: these values are indicative. If the run between battery and inverter is long, you’ll need to size up. And if your inverter manufacturer recommends a specific gauge, that recommendation takes priority. For the general logic behind gauge sizing by amps and distance for any circuit — not just inverters — see the Wire Gauge Calculator for 12V Systems.
🔋 Worth remembering: the right cable doesn’t help much if the battery can’t deliver the current the inverter is asking for.
Gear worth having for this installation
Beyond the inverter itself, a safe installation typically needs: cable of the right gauge, an ANL/MIDI/MEGA fuse and a compatible fuse holder, proper ring terminals, a crimper sized for thick cable, heat-shrink tubing, and a multimeter to check for voltage drop.
My real experience with inverters in campers and motorhomes
In my first camper van — a 2005 Ford Transit I converted between 2018 and 2019 — I installed a small inverter, around 300W. I mounted it on the side of the central cabinet, near the bed area, for fairly basic use: charging my phone, a few small appliances, my laptop, and maybe a small TV later on.
On paper it seemed like enough. I didn’t need heavy consumption or powerful appliances. But even with light use, it degraded over time. At first it worked fine — connect a charger or a small appliance, no problem. After a while it started making an increasingly obvious buzzing noise and stopped transferring charge properly. Eventually, even something very low-power would trigger the buzzing immediately, and it stopped working altogether.
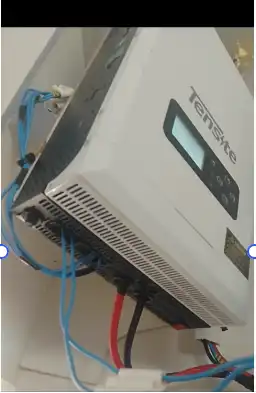
I fixed that years later when I traded the camper van for a historic 1982 motorhome. It came with a very basic setup — an external 230V hookup, lights, and a water pump meant to run off shore power. For real autonomy, I needed a proper inverter, so I installed a 1000W pure sine wave Tensite inverter with a reverse-charging function.
The difference compared to the small inverter was total. The 1000W Tensite runs stably, powers appliances without issue, and its LCD display gives useful data — battery voltage at the terminals, inverter status, and other operating info. The one drawback, and it’s common to nearly all inverters, is its own internal consumption when left on with no load. Leave it switched on all day without using an appliance and it slowly drains the battery — that’s why I switch it off when I’m not using it.
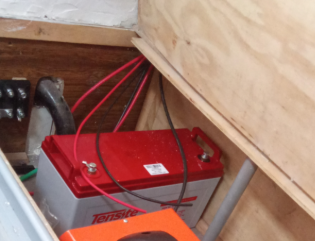
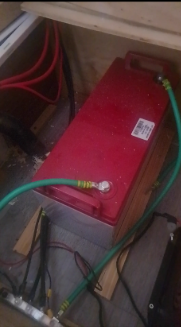
My takeaway from both experiences: for very occasional use, a small inverter might look sufficient, but if you want a stable setup with real margin, it’s worth installing a properly sized pure sine wave inverter, with good wiring, the right fuse, and a battery that can actually sustain it. I go into the exact voltage-drop math behind my own inverter cable run — 25mm² over about 1.5m — in how to wire an auxiliary battery in a camper van.
What cable to use for a 300W inverter
A 300W inverter is usually for small loads: a laptop, a camera, chargers, small electronics, the occasional low-consumption appliance. At full load it might draw around 25–30A from the battery.
For short runs, 6mm² or 10mm² usually works. If the run is a bit longer, go straight to 10mm² to cut losses. Even a small inverter like this should still have a fuse near the battery — don’t wire it “direct” without protection.
What cable to use for a 1000W inverter
A 1000W inverter already calls for a more serious installation. It might seem moderate, but at 12V it can draw around 90–100A near maximum load.
25mm² is a common choice for this power level in campers, especially with the inverter close to the battery. That gives you more margin and reduces the risk of voltage drop when running several appliances, or something with a startup surge.
A 1000W inverter is usually good for: charging a laptop, small household appliances, light power tools, camera chargers, a small coffee maker depending on wattage, and medium use in a camper or motorhome. Worth remembering: if your battery is small, having 1000W on the inverter doesn’t mean you can actually use it for long.
What cable to use for a 1500W inverter
A 1500W inverter can draw somewhere between 130A and 150A. Don’t cut it close on gauge here — for short runs, 35mm² is a reasonable choice.
This power level makes sense if you’re running somewhat more demanding appliances, or just want more margin than a 1000W setup gives you: a small coffee maker, a blender, power tools, simultaneous loads, more frequent 230V use. As power goes up, it matters more to review the whole system — battery, BMS, fuse, cable, connections, and ventilation, not just the inverter.
What cable to use for a 2000W inverter
A 2000W inverter in a 12V camper can draw between 170A and 200A. That’s a lot of current — at this point, the wiring isn’t a detail, it’s a critical part of the installation.
50mm² is a common gauge for a 2000W inverter on a short run. It’s also worth keeping the inverter as close to the battery as possible to avoid losses — placing a 2000W inverter far from the battery means very thick cable and a very carefully done install.
This power level can make sense for: a microwave, a hairdryer, a capsule coffee maker, a stove or other high-power appliances, intensive use in a motorhome or larger camper. But it’s not always worth it — if the battery can’t deliver that current, the inverter will shut down even with perfectly correct cable.
The distance between battery and inverter matters a lot
Placing the inverter 40cm from the battery is not the same as placing it 3 meters away. The longer the cable, the more voltage drop — and at 12V that’s very noticeable.
You also have to count both directions. If the inverter sits 2 meters from the battery, the actual electrical path is 4 meters: 2 meters positive, 2 meters negative.
Practical rules that follow from this:
- Keep the inverter as close to the battery as possible
- Use short, thick cable
- Avoid splices
- Don’t coil up spare cable
- Use proper terminals
- Always protect the positive with a fuse
What fuse to put between battery and inverter
The fuse protects the cable, not the inverter — that’s worth being clear on. It needs to be sized so that, in a short circuit or dangerous current spike, the line cuts before the cable overheats or burns, and it needs to sit as close as possible to the battery’s positive terminal.
For the full breakdown of how to size protection by power and expected current — including how efficiency, cable, and manufacturer guidance factor in — see what fuse size to use between battery and inverter. General reference:
| Inverter | Indicative fuse |
|---|---|
| 300W | 40A |
| 600W | 60–80A |
| 1000W | 100–125A |
| 1500W | 150–175A |
| 2000W | 200–250A |
| 3000W | 300A or more |
For high power, ANL, MIDI, or MEGA fuses are the usual choice depending on the install and amperage. The fuse holder matters too — a cheap, loose, or poor-contact fuse holder can generate heat and voltage drop on its own. For where each fuse in your system should actually sit, see where to place fuses in a 12V camper electrical system.
Why the inverter shuts down even though the battery is charged
This is a very common failure. The battery shows good resting voltage, but the moment you connect a heavy load, the inverter beeps, errors out, or shuts down. It can look like a faulty inverter, but often the problem is elsewhere.
Common causes: cable too thin, cable too long, loose terminals, a fuse with poor contact, a low-quality fuse holder, a small battery, a limited BMS, or voltage drop the moment the load kicks in.
Practical example: your battery reads 12.7V at rest. You connect a coffee maker to the inverter and it shuts down. You measure at the battery while the coffee maker is trying to run and see 12.1V — normal enough. But measuring at the inverter’s input, you see 10.8V. The battery isn’t discharged. The problem is in the path between battery and inverter.
How to check if your inverter cable is insufficient
The simplest way is to measure with a multimeter — always with the inverter actually working, not at rest.
- Connect a load to the inverter
- Measure voltage directly at the battery terminals
- Measure voltage at the inverter’s input
- Compare the difference
More than about 0.5V difference is worth investigating. You might need a larger cable gauge, less distance, better terminals, a different fuse holder, or a look at the negative and its return path to the battery. If undersized wiring in general — not just for an inverter — is what you suspect, Undersized Wire in a 12V System covers the symptoms and a quick test.
Be careful with the cable that comes with the inverter
Plenty of inverters include cable in the box, but that doesn’t mean it’s right for your final installation. Sometimes that cable is only meant for testing, very short runs, or a lower power than the maximum the unit is rated for.
Before using it, check: the actual gauge, its length, terminal quality, the manufacturer’s own recommendation, the power you’ll actually be using, and the fuse you’ll need. If you’re installing the inverter permanently in a camper, it’s usually best to make up the wiring yourself rather than rely on what’s in the box.
Terminals, crimping, and connections
Thick cable, poorly connected, can cause more problems than a slightly smaller cable installed properly. Terminals need to be crimped well — twisting the copper together isn’t enough.
- Use terminals sized for your cable gauge
- Use a proper crimper for thick cable
- Protect connections with heat-shrink tubing
- Tighten terminals fully
- Check for gaps
- Avoid intermediate splices
- Make sure the cable isn’t under tension
A poor connection creates resistance, and resistance creates heat.
The negative cable matters too
A common mistake is only reviewing the positive cable. But current has to return to the battery through the negative — if that’s thin, long, or poorly connected, you’ll see voltage drop there too. The negative should be sized the same as the positive.
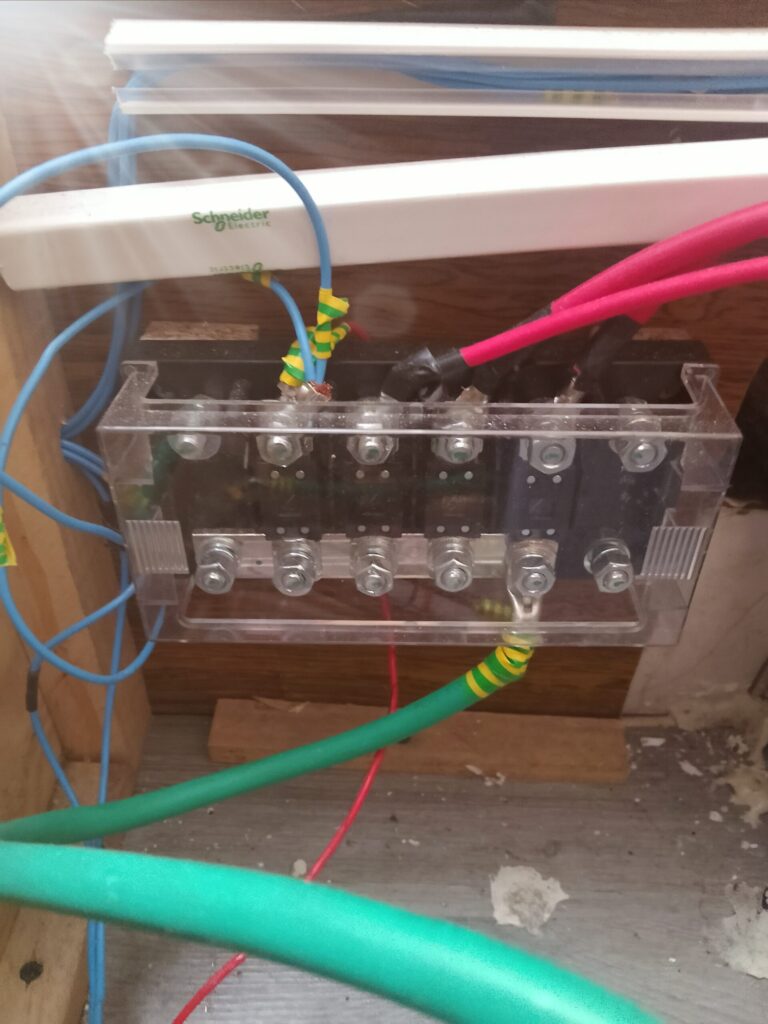
If you’re using the chassis as a ground point, make sure that connection is clean, unpainted, well tightened, and protected from corrosion. In a camper, it’s often cleaner and more controllable to run both positive and negative directly to the battery or to a proper distribution bar.
Thicker cable doesn’t fix everything
Sizing up helps, but it doesn’t solve every problem. If the inverter is shutting down, you also need to check whether the battery itself can deliver the current it’s asking for — this matters especially with LiFePO4 lithium batteries.
Check the battery’s BMS rating. Some 100Ah batteries have a 100A BMS — fine for a 1000W inverter, but potentially not enough for 1500W or 2000W. A 2000W inverter can demand more than 170A; if your battery’s BMS is capped at 100A, the system may cut out for protection. In that case, the problem isn’t the cable — the battery simply isn’t built for that inverter. If you’re weighing battery options with this in mind, see AGM vs Lithium in a Camper Van.
A bigger inverter isn’t always better
A bigger inverter lets you run more powerful appliances, but it also demands more from the whole system. Before installing a 2000W or 3000W unit, check: battery capacity, maximum BMS current, cable gauge, fuse, distance, ventilation, actual appliance consumption, and available autonomy. For plenty of campers, a well-installed 1000W or 1500W inverter serves better than a poorly sized 2000W one.
Common mistakes when wiring a camper inverter
- Using cable that’s too thin
- Placing the inverter far from the battery
- Skipping the fuse near the positive terminal
- Using a cheap or loose fuse holder
- Poorly connected terminals
- Not checking the negative
- Assuming the battery can handle any inverter
- Ignoring startup surge
- Running sensitive electronics off a modified-wave inverter
- Leaving the inverter on unnecessarily
- Not ventilating the inverter
- Using poor-quality power strips or adapters
FAQ
What cable gauge do I need for a 1000W inverter?
On a 12V installation with a short run, 25mm² is common. In my own installation I used 35mm² for extra margin. The final gauge depends on distance, how much voltage drop you’re willing to accept, and the manufacturer’s own recommendation.
What cable should I use for a 1500W inverter?
A 1500W inverter can draw roughly 130–150A. For short runs, 35mm² is common, though you’ll need to size up for a longer distance between battery and inverter.
What gauge does a 2000W inverter at 12V need?
A 2000W inverter can draw roughly 170–200A. For short runs, something close to 50mm² is typical. Also check distance, acceptable voltage drop, fuse, battery capacity, BMS limits, and the manufacturer’s guidance.
How do I calculate the inverter cable distance for voltage drop?
Count the full round-trip path. If there are 2 meters between battery and inverter, use 4 meters in the calculation — 2 meters of positive cable and 2 meters of negative.
Why does the inverter shut down even though the battery is charged?
There may be voltage drop from cable that’s too thin or too long, loose terminals, a poor fuse holder, or an undersized negative. It can also be that the battery or its BMS simply can’t deliver the current being asked for.
Should the positive and negative cables be the same gauge?
Normally, yes. The same current arriving at the inverter through the positive has to return through the negative — a negative that’s too thin can cause heating, voltage drop, and shutdowns even when the positive is sized correctly.
Can I just use the cables that came with the inverter?
Only if their gauge and length actually suit the power you’re running and match the manufacturer’s guidance. Some included cables are meant for testing or very short runs and can be too small for a permanent installation.
Conclusion
Installing an inverter in a camper isn’t just about choosing the right power — the wiring matters just as much.
Quick summary: for 300W, normally 6–10mm²; for 1000W, normally 25mm²; for 1500W, normally 35mm²; for 2000W, normally 50mm². Keep the inverter near the battery, put the fuse near the positive, size the negative the same as the positive, and remember that voltage drop can shut the inverter down even with a fully charged battery — and that the battery and its BMS have to be able to deliver the current the inverter is asking for.
A properly done installation avoids heating, energy losses, unexpected shutdowns, and hard-to-diagnose problems. Before you blame the inverter, check the cable, the fuse, the connections, the battery, and the voltage drop first.
🔧 Related guides
Inverter Size Calculator for Camper Vans
Work out the right inverter power for your setup before you wire anything.
What Fuse Size Between Battery and Inverter
The cable protects nothing without the right fuse sized to match it.
AGM vs Lithium in a Camper Van
Battery chemistry and BMS limits change what your inverter can actually draw.
[…] ¿Prefieres verlo en inglés? Aquí tienes la guía equivalente sobre qué sección de cable usar para el inversor: What Wire Gauge to Use for a Camper Inverter → […]
[…] What wire gauge to use for a camper inverter (1000W, 1500W, 2000W) […]