
When solar stops charging, the panel is almost never the problem. Panels are the most reliable component in the system — no moving parts, sealed, and warrantied for twenty-five years.
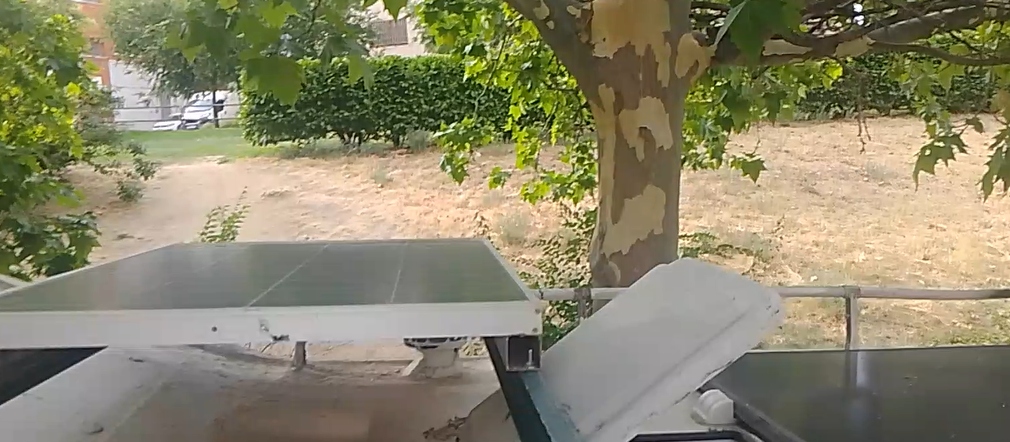
The fault is usually in the twenty feet between the panel and the battery, or in a setting.
Most articles on this hand you a list of ten possible causes and leave you to guess which one is yours. This one does it the way you’d actually diagnose it: walk the circuit with a multimeter, measuring at five points in order. Each measurement rules out everything upstream of it, so by the fifth you know exactly where the fault is — usually in under fifteen minutes.
I charge my own motorhome from solar only, and I’ve had this go wrong in several different ways. The order below is the one I use.
“I killed a perfectly good AGM running a 230 V fan overnight through an inverter. That’s the kind of mistake this site is built to save you from.”
The short version
- The panel is almost never the fault
- Five measurements locate it in under fifteen minutes
- The controller powers itself from the battery side, not the panel
- Most cases turn out to be settings, cable, or connectors
First: three things that look like a fault and aren’t
Before you take anything apart, rule these out. They account for a large share of “my solar isn’t charging” cases.
The battery is already full. When a battery reaches full charge, the controller moves into float and drops the current to almost nothing. You look at the display, see 0.3 A going in on a bright day, and conclude something is broken. Nothing is broken — there’s nowhere left to put the energy.
Check it by: switching on a decent load for a few minutes. If the current climbs as soon as the battery has room, the system is working perfectly.
Partial shade is doing far more damage than it looks. Cells in a panel are wired in series, so the shaded cell limits the current for the whole string. A branch shadow across one corner, a roof vent, a bike rack — any of these can cut output by half or more, not by the fraction of area they cover.
Check it by: measuring output with the shadow present and again with the van moved into open sun. If the difference is dramatic, you’ve found it.
Cold weather with a lithium battery. LiFePO4 cannot be charged below 0 °C, and the BMS blocks it to prevent permanent damage. On a freezing morning with brilliant sunshine, the panels produce, the controller works, and the battery refuses the charge. That’s the protection doing its job.
Check it by: waiting until the battery warms above freezing and trying again. If it charges, that was it. More on lithium’s cold-weather limit here.
The five measurements, in order
Do these in sequence. Each one tells you whether the fault is upstream or downstream, so you halve the possibilities every time.
You need a multimeter and daylight. Ideally full sun.
Measurement 1 — Is the controller alive at all?
The thing most people don’t know
A solar charge controller powers itself from the battery side, not from the panel side. Full sun on the roof and a dead battery connection means the controller doesn’t switch on at all.
- Nothing on the display, no LEDs, no Bluetooth → the controller isn’t being fed. Check the battery cable and its fuse before looking anywhere else.
- Controller shows battery voltage → it’s alive. Continue.
This single check resolves a surprising number of cases, and it’s the one people skip because they start by climbing on the roof. If the controller shows no life at all, not even blinking, start with this separate checklist for a dead-looking controller.
Measurement 2 — Is the panel producing?
Where: at the panel connectors, disconnected from the controller. Measure DC volts across positive and negative.
- A 12 V nominal panel should read 18-22 V open circuit in decent sun
- Under 15 V → shading, dirt, or a damaged panel
- Zero → broken panel, broken connector, or reversed measurement
⚠ Order matters
Disconnect the panel from the controller before measuring. When reconnecting, always battery first, panels second — the controller reads battery voltage to work out whether it’s a 12 V or 24 V system.
Measurement 3 — Is that voltage arriving at the controller?
Where: at the controller’s PV input terminals, panel connected.
Compare with measurement 2.
- Same voltage (within a few tenths) → the run from roof to controller is fine
- Noticeably lower → you’re losing it in the cable, a connector or a fuse
That roof-to-controller run is the longest cable in most vans and the one people size by eye. It’s a classic place to find undersized wire, and the symptom looks exactly like a weak panel.
Measurement 4 — Is the controller doing its job?
Where: at the controller’s battery output terminals, everything connected, in sun.
- Should read higher than the battery’s resting voltage — typically 13.5 to 14.6 V depending on the charge stage
- Reads the same as the battery, with good panel voltage at the input → the controller isn’t converting. Either it’s failed, or it’s in float because the battery is full, or the battery type is set wrong
One condition to know about: most MPPT controllers need panel voltage roughly 5 V above battery voltage before they’ll start. On an overcast morning the panel may produce 14 V, which is real output but not enough to begin charging. Nothing is faulty. Once it does start charging, how long it takes to actually fill the battery depends on more than panel wattage — here’s how to estimate real charge time.
Measurement 5 — Is it reaching the battery?
Where: at the battery terminals, at the same moment as measurement 4.
- Same as measurement 4 → the whole chain is working
- Lower → you’re losing it between controller and battery. Cable, fuse, or a terminal
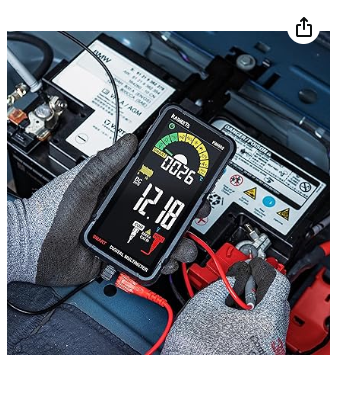
If measurements 4 and 5 differ by more than about 0.3 V, that gap is your fault, and it’s in a section of cable you can reach.
What your voltage reading actually means
A voltage on its own tells you little unless you know the chemistry and the conditions. These are resting values — measured at least two hours after any charging or discharging.
| Resting voltage | AGM / lead-acid | LiFePO4 |
|---|---|---|
| 13.4 V+ | still charging | 100% |
| 13.2 V | still charging | ~90% |
| 13.0 V | just off charge | ~50% |
| 12.8 V | ~100% | ~20% |
| 12.5 V | ~75% | nearly empty |
| 12.2 V | ~50% — stop here | empty |
| 11.9 V or less | damaged | BMS should have cut off |
Look at the 12.8 V row. The same reading means a full AGM and a nearly flat lithium. If you’ve switched chemistry and kept your old habits, this is where you’ll misread your own system.
And a warning about lithium specifically. Its voltage curve is so flat through the middle of its range that voltage is a poor guide to state of charge — a tenth of a volt covers a large chunk of capacity. This is why a shunt-based battery monitor stops being a luxury with lithium. With lead-acid you can navigate by voltage; with lithium you’re guessing until it’s almost empty.
The decisive test: bypass the controller
If the five measurements have left you unsure whether the fault is the panel or the controller, there’s a test that settles it in a minute.
Connect the panel directly to the battery, briefly, through a fuse.
If the battery voltage rises, the panel and its wiring are fine and the controller is your fault. If nothing happens, the panel is.
How to do it safely:
- Fuse the connection. Use an inline fuse rated for the panel’s short-circuit current, on the positive line.
- Watch it, and disconnect within a couple of minutes. There’s no regulation in this configuration — the panel will keep pushing current with nothing to stop it.
- Never leave it connected. Not for an hour, not “just while I go and check something.” An unregulated panel on a battery is exactly what a charge controller exists to prevent.
- Don’t do this with lithium. The BMS may disconnect mid-test, and if it doesn’t, there’s nothing limiting the charge voltage. On lead-acid a brief test is survivable; on LiFePO4 it isn’t worth the risk.
- Watch the polarity. Reversed, you’ll blow the fuse at best.
It’s a crude test and that’s the point — it removes the controller from the equation entirely, which no amount of reading its display can do.
The causes, in order of how often they turn out to be it
1. Controller settings. The most common cause after the ones already ruled out, and the least visible. If the battery type is set wrong, the controller charges — just never to completion. An AGM on a gel profile never reaches full absorption and sulfates slowly. A lithium on a lead-acid profile sees equalization pulses it should never receive. And temperature compensation, which is correct for lead-acid, must be turned off for lithium. Full settings table here.
2. Voltage drop on the panel run. Roof to controller is the longest cable in most builds and the one people size by eye. Losing two volts there means the controller may never see enough to start charging on a cloudy day. How to confirm it.
3. Connectors. MC4 connectors are weatherproof when properly crimped and seated, and a source of intermittent faults when they aren’t. They live on the roof, under UV, through freeze and thaw. If your output is intermittent rather than absent, start here.
4. A blown fuse between controller and battery. Easy to overlook because everything still lights up — the controller is fed through that same line and may keep working while delivering nothing.
If that fuse keeps blowing every time you reconnect it rather than just being a one-off, the cause is usually something specific — not bad luck. See Why Does the Fuse Keep Blowing in My Camper’s 12V System? for the full diagnostic walkthrough.
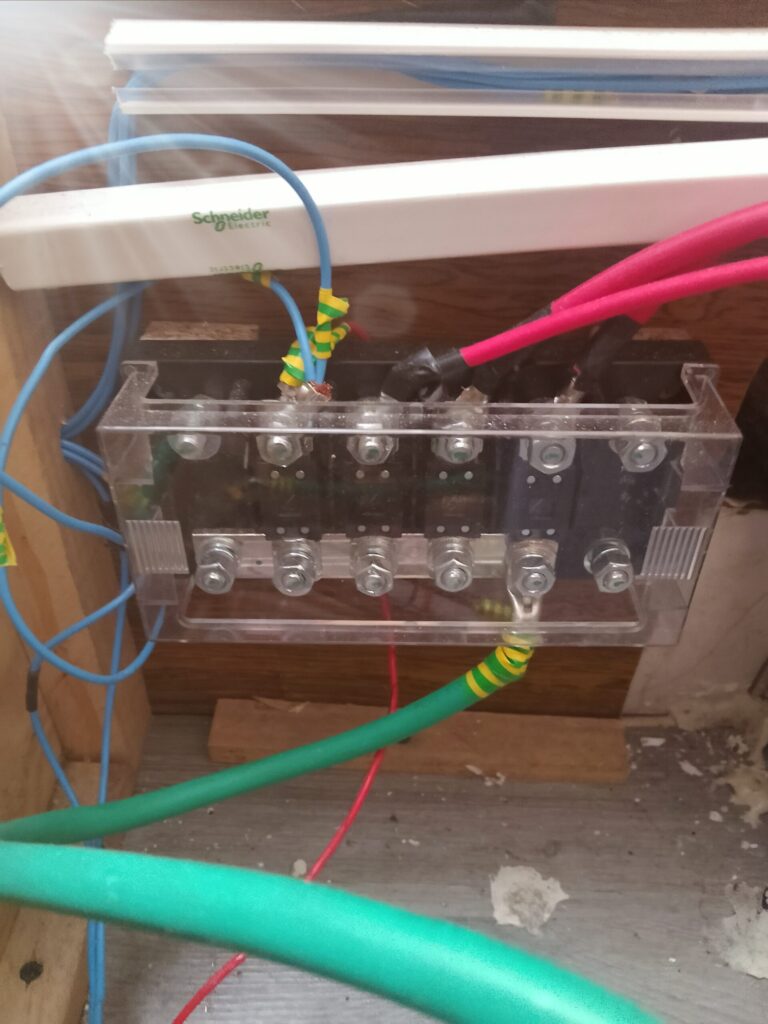
5. Corrosion at the battery terminals. Especially on lead-acid, especially in a damp van. Enough resistance there and the controller reads a battery voltage that isn’t the real one, and charges accordingly.
6. The panel itself. Rare. Panels fail from physical damage — a cracked cell from something dropped on it, water ingress at the junction box, a rodent through the cable. If measurement 2 shows nothing and the connectors are good, then yes, it’s the panel.
7. The controller itself. Uncommon, but it happens. What that looks like is below.
A lithium battery reading 0V isn’t necessarily dead
Worth knowing before you throw an expensive battery away.
If a LiFePO4 has been discharged far enough, the BMS disconnects the terminals entirely to protect the cells. From the outside the battery reads zero volts and appears completely dead. It usually isn’t.
Many BMS units will wake up when they detect a charge voltage present. Connect a compatible charger and leave it for ten or fifteen minutes before concluding anything. Some manufacturers publish a specific wake-up procedure — worth checking the manual for yours.
Two things follow from this:
Solar alone may not recover it. The charge controller reads battery voltage to work out what it’s connected to. A battery at 0 V gives it nothing to read, so the controller sits idle in full sun. You need a mains or DC-DC charger to bring it back, and then solar takes over normally.
And this is exactly why deep discharge matters even with lithium. The chemistry tolerates deep cycling far better than lead-acid, but taking it to BMS cut-off repeatedly is not a normal operating mode. It’s the protection of last resort.
When the controller is genuinely faulty: mine failed at nine months
Everything above assumes the controller works. Mine didn’t, and here’s what a real failure looks like from the outside.
I run two controllers on the same battery bank: an SRNE MPPT and a Victron SmartSolar MPPT 75/15. The Victron failed at under nine months old.
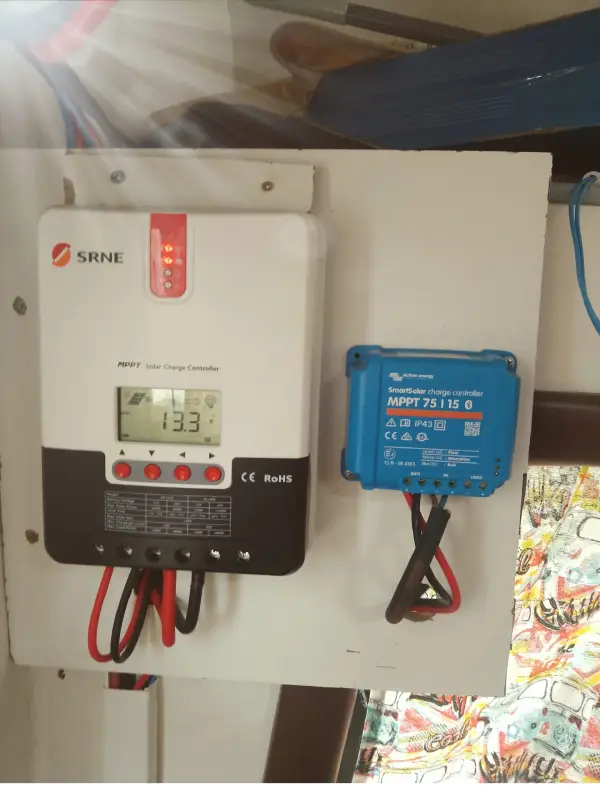
The symptoms:
It still receives panel voltage — that side is fine and measures correctly. It still reads a battery voltage. But it stopped doing its job, and the way it announced that was through the app.
Using the PIN printed on its own label, the Bluetooth connection climbs to 95 % and then drops. Every time. The app displays a firmware update prompt, and the update stalls partway through and never finishes. I’ve tried it repeatedly, on different days.
A connection that consistently fails at the same point, and an update that consistently stalls, is not a signal problem. It’s the unit.
And here’s the measurement trap I fell into
Because both controllers are connected to the same battery, the Victron reads a battery voltage that arrives through the other controller’s connection. It looks like a healthy reading. It tells you nothing about whether the Victron’s own battery connection is intact.
If you run two controllers on one bank, measurement 5 is not diagnostic. You have to isolate each controller and test it against the battery on its own. Otherwise a controller with a completely dead battery-side connection will still display a plausible voltage, borrowed from its neighbor, and you’ll spend an afternoon looking in the wrong place.
I don’t see this mentioned anywhere, and dual-controller setups are common once people add a second panel.
What to do about it
Victron gives five years of warranty. Mine failed in nine months, so it’s a warranty case, not a repair project — and that’s the right answer for anyone in the same position. Find the receipt, note the serial number, and go through the dealer.
The lesson isn’t “avoid Victron.” It’s that any component can fail inside its warranty, and that keeping receipts for electrical parts is worth the drawer space. A controller is one of the few parts in a van where the manufacturer will actually replace it.
Cleaning, and why bypass diodes matter
Cleaning. Panels lose output to dust, pollen, bird droppings and tree sap, and the loss is larger than it looks because of how cells are wired. A soft brush, water and mild soap is all it needs. Avoid anything abrasive — you’re cleaning glass with a coating on it.
Every few weeks is plenty in normal conditions, more often under trees or in dusty regions. And do it in the morning while the panel is cool, not at midday on hot glass.
Bypass diodes are small components built into the panel’s junction box, wired across groups of cells. Their job is to let current route around a shaded or faulty section instead of the whole panel shutting down.
They’re the reason partial shade reduces output rather than eliminating it. Without them, one shaded cell would stop everything.
Two things worth knowing:
They reduce the effect of shading, they don’t remove it. A shadow across one corner still costs far more output than the shaded area suggests, because it disables an entire cell group.
And they can fail. A failed bypass diode creates a hot spot — a section that heats instead of producing — and permanently reduces output. If a panel that used to perform well has dropped off with no visible damage and no shading, a failed diode is a candidate. It’s usually not economically repairable.
Frequently asked questions
Why is my solar panel not charging my battery?
Usually it isn’t the panel. Work through the circuit in order: check the controller is powered from the battery side, then panel output at the connectors, then that same voltage at the controller input, then the controller’s output, then what reaches the battery. Each measurement rules out everything upstream. The most common actual causes are wrong controller settings, voltage drop on the roof-to-controller run, and connectors.
· How do I know if my solar charge controller is faulty?
If panel voltage arrives at its input and battery voltage is present, but its output never rises above the battery’s resting voltage in full sun, the controller isn’t converting. Before concluding it’s dead, check whether the battery is simply full and the controller is in float, and check the battery type setting. Genuine failure also shows up as unstable behavior — connections that drop at the same point every time, or firmware updates that won’t complete.
Can a solar panel charge a completely flat battery?
Often not, and it catches people out. A charge controller powers itself from the battery side, so a battery that’s fallen far enough may leave the controller with nothing to run on. It sits dead in full sun. Bring the battery up with a mains or DC-DC charger first, then solar takes over.
· Why does my controller show panel voltage but no charging current?
Three likely reasons. The battery may be full and the controller in float. The panel voltage may not exceed the battery voltage by enough — most MPPT controllers need roughly 5 V of headroom before they start. Or with lithium in freezing conditions, the BMS is blocking charge.
How much difference does partial shade actually make?
Far more than the shaded area suggests. Cells within a panel are wired in series, so a shaded cell limits current for the entire string. A branch shadow across one corner, or a roof vent, can halve output. Bypass diodes reduce the effect but don’t remove it.
Do I need to disconnect anything before measuring?
To measure panel open-circuit voltage, disconnect the panel from the controller. When reconnecting, always connect the battery to the controller first and the panels second — the controller reads battery voltage to determine whether it’s on a 12 V or 24 V system.
[…] ¿Prefieres verlo en inglés? Aquí tienes la guía equivalente para encontrar el fallo con cinco mediciones: Solar Panel Not Charging the Battery? → […]
[…] ¿Prefieres verlo en inglés? Aquí tienes la guía equivalente para encontrar el fallo con cinco mediciones: Solar Panel Not Charging the Battery? → […]
[…] ¿Prefieres verlo en inglés? Aquí tienes la guía equivalente para encontrar el fallo con cinco mediciones: Solar Panel Not Charging the Battery? → […]
[…] Solar Panel Not Charging the Battery? Find the Fault in Five Measurements […]
[…] Solar Panel Not Charging the Battery? Find the Fault in Five Measurements […]
[…] Solar Panel Not Charging the Battery? Find the Fault in Five Measurements […]
[…] If the controller shows no current, voltage isn’t rising, or the battery keeps draining during daylight hours, here’s what to check before you start swapping components. […]
[…] Solar panel not charging? Find the fault in five measurements […]
[…] Solar Panel Not Charging the Battery? Find the Fault in Five Measurements […]