
Common Mistakes in Camper Van Solar Installations
22 oct 2026 · @gustavo
Quick answer
- The most common solar mistakes are thin cable, a fuse in the wrong place, and loose or badly crimped connections.
- The costly ones are a charge controller too small for the panels and a battery too small for the load.
- Check every connection and voltage with a multimeter before you leave, and watch the controller for the first few days.
Most solar problems in a camper van are not bad panels. They are small installation mistakes that are easy to make and easy to avoid once you know them. A wire a bit too thin, a fuse a bit too far from the battery, or a terminal that is not tight can cost you charge, heat a connector or take out a controller.
I have made or seen several of these on real vans, and the worst of them ended with a blown fuse or a blown controller. This page covers six of them, why each one fails, how to avoid it, and a short checklist to run before you connect the battery. I check my own installation with a multimeter and the Victron app on my phone, and I will say where each tool helps.
The six mistakes
1. Cable that is too thin. A thin cable loses voltage between the panels, the controller and the battery, so you charge less than the panels can give. It can also get warm. Size the cable for the current and the length of the run, and keep the voltage drop low, around 3% or less as a common rule of thumb. Our Spanish cable section guide has the table.
2. A fuse in the wrong place, or no fuse. The fuse protects the cable, so it goes on the positive wire as close to the battery as possible. A fuse far from the battery leaves a stretch of live cable with no protection. Choose the rating for the cable and the controller, not for the battery. Our guide on where to place fuses explains the layout (Spanish original).
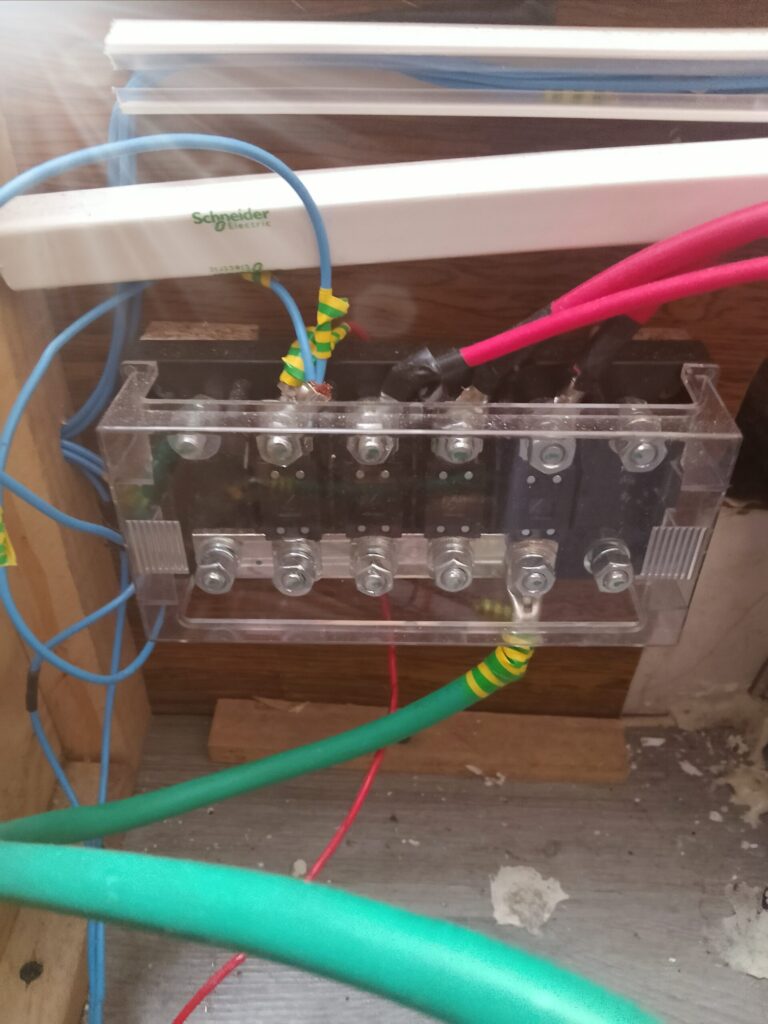
3. Loose or badly crimped connections. A terminal that is not tight, or a crimp that was done with pliers, makes resistance, and resistance makes heat. It often looks fine and fails weeks later. Use proper lugs and a proper crimping tool, tighten each connection, and give each cable a gentle pull to test it.
4. Partial shade on the panels. A small shadow from a roof rack, a vent or an antenna can cut the output of a whole panel, much more than the size of the shadow suggests. Place the panels away from anything that throws shade, and look at the roof at different times of day before you drill.
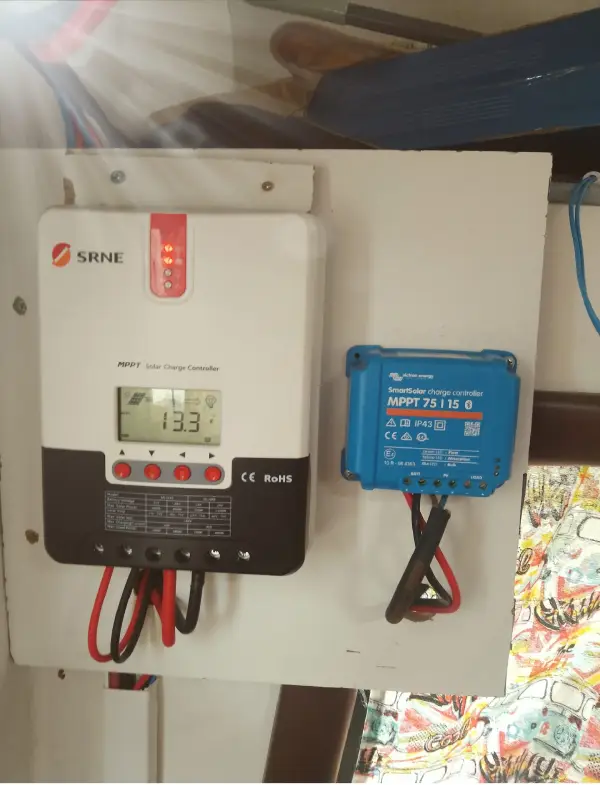
5. A charge controller that is too small. Every controller has two limits: the maximum panel voltage and the maximum charge current. For example, my Victron MPPT 75/15 accepts up to 75 V from the panels and 15 A to the battery. Cold weather raises the panel voltage, so a controller used too close to its voltage limit can be damaged on a cold, sunny morning. Check both numbers with the panel data before you buy.
6. A battery that is too small for the load. Solar fills the battery during the day, but the battery has to carry the night. If you use the heater or a fan overnight, a small battery ends the night low and the next day starts behind. Work out your daily use first, then choose the battery, and keep the battery above about half charge if it is AGM. See how many amp-hours your camper battery needs (Spanish original; English slug to confirm).
How to check voltage drop with a multimeter
Voltage drop is the quickest way to find a thin cable or a bad connection, and it takes five minutes. Do it on a sunny day, when the panels are producing, so there is current in the wires.
- Set the multimeter to DC volts.
- Measure the voltage at the battery terminals. Write it down.
- Measure the voltage at the controller’s battery terminals. Write it down.
- Subtract the two numbers. That difference is the voltage drop on the battery cable.
- Repeat on the panel side, between the panel connector and the controller’s panel input.
As a rule of thumb, a drop of more than about 3% of the system voltage (around 0.4 V on a 12 V system) points to a cable that is too thin, too long, or to a loose connection. If you find a drop, feel the connections after a while with the current flowing, and tighten any that are warm. I do these checks with my multimeter, and then I look at the numbers in the Victron app.
Quick cable size guide for a 12 V run
The formula below gives the minimum cross-section for copper cable, keeping the drop to 3% (0.36 V) on 12 V. The length is one way, from the source to the load.
S_{mm^2} = \frac{I \times 0.0344 \times L}{0.36}| Current | One-way length | Minimum section | Standard size to use |
|---|---|---|---|
| 10 A | 3 m | 2.9 mm² | 4 mm² |
| 15 A | 3 m | 4.3 mm² | 6 mm² |
| 15 A | 5 m | 7.2 mm² | 10 mm² |
| 30 A | 3 m | 8.6 mm² | 10 mm² |
| 30 A | 5 m | 14.3 mm² | 16 mm² |
These are calculated values for copper at room temperature, not a substitute for the cable’s own current rating and the fuse. Always check both. For the full table in Spanish, see our cable section guide.
Check the controller’s limits, cold weather included
Panels in series add their voltages. A panel’s open-circuit voltage (Voc) is printed on its label, and it rises when the panel is cold. As a rough rule, add 10% to 15% to the label’s Voc for freezing mornings, and make sure the total stays under the controller’s maximum input.
Example with panels that have a Voc of about 22 V each (typical for a 12 V panel; check your own label):
| Panels in series | Voc on the label | With a 15% cold margin | On a 75 V controller |
|---|---|---|---|
| 2 | 44 V | 50.6 V | Safe |
| 3 | 66 V | 75.9 V | Over the limit |
The second row is the trap: it looks fine on paper at 66 V, but a cold sunny morning can push it over 75 V and damage the controller. Parallel connections add current, not voltage, so also check that the total current stays under the controller’s maximum charge current (15 A on my MPPT 75/15).
What you see and what it usually means
| What you see | Likely mistake |
|---|---|
| Battery charges slower than the panels should allow | Thin cable, long run or loose connection |
| A cable or connector is warm after hours of sun | Loose connection, or cable too thin for the current |
| Charge drops sharply when a small shadow falls on one panel | Partial shade |
| Controller shows an error or stops after a cold sunny morning | Panel voltage over the controller’s limit |
| Battery is low every morning even with sunny days | Battery too small, or load larger than you think |
| A fuse blows for no clear reason | Wrong fuse rating, a short, or a bad connection |
Use the table to decide what to measure first. A multimeter and the controller’s app answer most of these in a few minutes.
The order I would install it in
Most of the mistakes above come from rushing the last step. This order keeps the system safe while you work:
- Plan the cable runs and choose the section for each one.
- Mount the panels and check the shade at different times of day.
- Run the cables and fit the fuses, but leave the fuse out for now.
- Make every connection with proper lugs, and tighten them.
- Connect the battery to the controller first, then the panels.
- Put the fuses in, then measure the voltages with a multimeter.
- Watch the controller for a few days, and look again at the connections after the first week.
The controller should see the battery before the panels. Many controllers detect the battery voltage at start-up, and connecting the panels first can confuse them or damage them.
Checklist before you connect the battery
- The cable section matches the current and the length of the run.
- A fuse sits on the positive wire close to the battery, with the right rating.
- Every terminal is tight and every crimp is done with a proper tool.
- The panels get no shade at any time of day.
- The panel voltage, cold-weather voltage included, stays under the controller’s limit.
- The battery is big enough for a night’s use.
- With a multimeter, the voltage at the controller is close to the voltage at the battery.
- The controller shows charge in the app or on the display during the first days.
FAQ
What is the most common mistake in a camper van solar installation?
A cable that is too thin, followed closely by a fuse in the wrong place and loose connections. They are cheap to avoid and costly to fix later.
Where should the fuse go?
On the positive wire, as close to the battery as possible. Choose its rating for the cable and the controller, and follow the controller’s manual.
Can partial shade ruin a panel’s output?
It can cut the output of a whole panel by far more than the size of the shadow, so keep the panels clear of racks, vents and antennas.
How do I know if my charge controller is the right size?
Check two limits against the panel data: the maximum panel voltage, remembering that cold weather raises it, and the maximum charge current.
How do I check my installation without special tools?
A multimeter is enough for voltages and continuity. A controller with Bluetooth, like my Victron, also shows the panel voltage and the energy collected in an app.
How big should the battery be?
Big enough for your night use without dropping below about half charge if it is AGM. Work out your daily amp-hours first.
Internal links and close
Related reading:
- Solar charge controller not showing charge
- Undersized wire in 12V systems
- How long to charge a camper battery with solar
- Adding a second solar panel
- How to size a DC-DC charger
Close: size the cable and the fuse for the current, tighten everything, keep the panels out of the shade, and check the controller’s limits and the battery’s size before you power it up.