
When a camper solar setup doesn’t seem to be charging, most people assume the panel is broken or the controller has died. But before you touch anything, it’s worth separating two different problems.
One thing is that the controller isn’t showing data — on its screen, LED, or app. Another is that the system genuinely isn’t charging. Sometimes the controller is powered on but isn’t receiving enough energy from the panel. Other times there’s plenty of sun, but the energy never arrives because a fuse, connector, or cable has failed somewhere along the way.
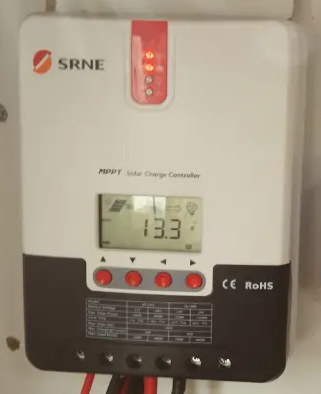
If your question is more general — why the solar panel isn’t charging the battery, rather than how to tell whether the panel or the controller is at fault — that guide answers it better than this one.
Quick diagnosis table
| Symptom | Likely cause | Check first |
|---|---|---|
| LED off | No power, or no PV input | Battery and fuses |
| Bluetooth connects but PV = 0 | Panel, MC4 connector, or wiring | Panel voltage |
| Bluetooth won’t connect | Controller has no power | Battery-side fuse |
| Very low PV | Shade, dirt, or a degraded panel | Inspect the panel |
| PV shows fine, battery still won’t charge | Configuration or battery | Check battery type setting |
Recommended order to find the fault
- Check the LED.
- Open the Bluetooth app.
- Check the panel voltage.
- Check the fuses.
- Measure with a multimeter.
- Check the controller’s configuration.
1. Start with the controller’s LED
The LED is the fastest first read, even though it doesn’t tell you everything.
On most solar controllers:
- Flashing LED: the controller is actively charging — could be in bulk or absorption phase.
- Steady LED: the battery is in maintenance/float. The controller sees a charged battery, or one with very low draw.
- LED off: not enough input from the panel, no battery detected, or the controller itself isn’t powered.
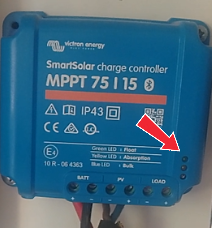
This can vary by brand, so it’s worth checking your specific model’s manual — but as a quick first read, it works.
The important thing: don’t draw conclusions from the LED alone. A dead LED doesn’t automatically mean a broken panel — it could just as easily be lack of sun, shade, a blown fuse, a loose MC4 connector, a disconnected battery, or the controller simply not being powered.
Worth knowing: the controller’s display and LED usually run off the battery, not the panel. If the battery has been drained very low, the controller may not power on at all — no LED, no display — regardless of how much sun is hitting the array. That looks exactly like a dead controller, but it isn’t one. Measuring battery voltage directly at the terminals rules this in or out before you suspect the controller itself.
2. Open the controller’s Bluetooth app
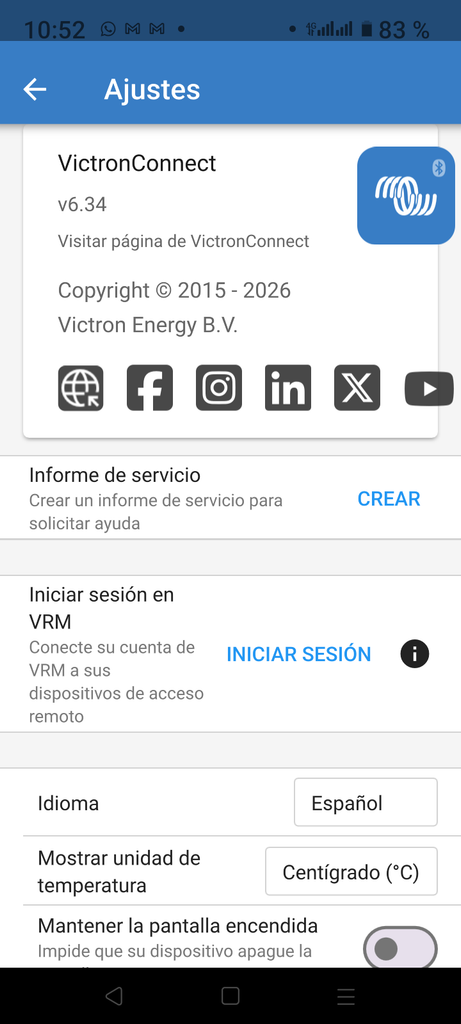
If your controller has Bluetooth, use it before you take anything apart. On Victron-type controllers, that’s VictronConnect; other brands have their own app. Many controllers have a QR code on the label to pair faster.
The app gives you far more than the LED does:
- Solar panel voltage
- Current or power coming in from the panel
- Battery voltage
- Charge status
- Production history
- Any errors the controller has logged
This matters because you stop guessing — you can see directly whether the controller is receiving anything from the panel at all.
3. If the app connects but PV shows 0
This case is fairly clear-cut. If you can get into the controller over Bluetooth, that means the controller is alive and powered. If, at the same time, solar input reads 0V, 0A, or 0W despite there being enough sun, the controller usually isn’t the first suspect.
Here’s where I’d look:
- The solar panel itself
- MC4 connectors
- Any fuse between panel and controller
- The wiring run from the roof
- PV input polarity
- Heavy shade on the panel
The key logic: if the controller powers on, connects over Bluetooth, and reads the battery fine, but sees nothing on PV, the break is most likely upstream of the controller.
If yours is an MPPT controller specifically: most MPPT units need the panel’s voltage to sit meaningfully above the battery’s — roughly 5V higher is a common threshold — before they’ll start charging at all. Below that margin, the controller just sits waiting rather than showing a fault. Long or undersized wiring runs eat into that margin through voltage drop, and heat does too, since a hot panel’s voltage drops — so a setup with little headroom to begin with can stop charging on a hot afternoon after working fine that morning. This doesn’t apply to PWM controllers, which switch the panel straight through to the battery without that voltage requirement.
Check:
- The fuse between battery and controller
- BAT+ and BAT- terminals
- Actual battery voltage
- The ground/negative bus connection
- Whether any LED lights up at all
4. If Bluetooth won’t connect at all
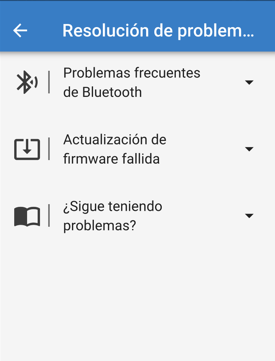
This points somewhere different. It could just be a pairing hiccup — but if it connected before and now never shows up, check whether the controller has power at all.
On most controllers, main power comes from the battery side. If that line is disconnected, the fuse has blown, or the battery is critically low, the controller may not even power on or broadcast Bluetooth.
No LED, no Bluetooth, no reading — that points to a power problem at the controller itself, not necessarily the panel.
5. If PV shows something, but very little
Another common case: the app shows solar input, but barely any. There’s sun, but the panel is only delivering a handful of watts. Here the controller does see the panel — something else is limiting output.
Possible causes:
- Partial shade
- A dirty panel
- Poor orientation
- An overheated panel
- A degraded panel
- A loose connection
- A damaged cable
- An old panel whose real condition you don’t actually know
This shows up a lot in secondhand campers or motorhomes that already came with panels fitted — you often have no idea how old the panel is or how well it’s actually been performing. If the panel is old and the app shows very low numbers despite good sun, it’s worth measuring directly at the controller’s PV input and comparing.
The opposite problem also happens: a panel — or an added second panel — delivering more voltage or current than the controller is rated for. Most controllers have built-in protection that will limit or stop charging rather than risk damage, which can look like a fault even though it’s working as designed. Worth checking your controller’s rated PV input against your actual panel specs, especially if you’ve expanded your array since it was first installed.
6. Also check the controller’s configuration
This guide is mainly about telling panel, wiring, and controller apart — but configuration is worth a mention too.
Worth noting: how much you can configure often depends on the controller type itself — a basic PWM controller may offer little or no battery-profile adjustment, while most MPPT controllers let you set it properly. If you’re not sure which type you have or which makes sense for your setup, see MPPT vs PWM: Which Solar Controller.
If the controller is set up for the wrong battery type, it can charge poorly even when the panel and controller are both working correctly. AGM, GEL, and lithium don’t charge the same way, and a mismatched battery-type setting is one of the most common mistakes in camper solar installations. If you’re deciding between AGM and lithium for your own setup, I go into the real trade-offs — cost, weight, lifespan, cold-weather behavior — in AGM vs Lithium in a Camper Van.
If you’re on lithium with an external BMS: on those setups, the controller isn’t always the one deciding whether to charge. The BMS itself can hold charging off — commonly if the cell temperature is too low, or if the pack is already full — and from the outside that looks identical to a broken controller: powered on, panel producing, but zero charge current. Worth checking the BMS app or display for a lockout status before assuming the fault is in the controller.
One more thing worth checking, separate from battery type: some controllers and apps include a distinct charging enable/disable toggle somewhere in the settings, apart from the battery-type setting. Not every model has this — check your specific app’s menus rather than assuming it applies. If yours does have it and it’s ever been switched off, even briefly, confirm it’s actually back on before suspecting the panel or wiring.
7. Final check with a multimeter
The app helps a lot, but the clearest check is measuring voltage directly on the panel input cables, right before the controller.
With sun on the panel, you should see voltage on those cables. If nothing arrives there, the problem is upstream: panel, wiring, fuse, or connectors. If voltage does arrive there but the controller’s app still shows 0V on PV, that points more toward the controller or its input terminals.
Do this test carefully, and avoid shorting positive to negative. A basic multimeter is all you need.
My personal experience
This happened to me recently with a Victron 75/15 controller in my motorhome. The LED stopped flashing overnight, with no obvious change to the installation. The panel came already fitted with the vehicle, so I have no real way of knowing how many years it’s been in service or how it performed before it was mine.
Before touching anything, I followed the same order I lay out in this guide: I checked the LED first (off, no flashing), then went to measure the actual voltages with the controller’s connections disconnected, to rule the panel and battery in or out individually.
Update — I’ve since confirmed it: disconnected from the controller, the panel measures 17.5–18V depending on the sun — a normal, healthy reading. On the battery side, since this bank is wired in parallel with a second controller, the terminals read the same as that neighboring controller’s — around 12.5V depending on time of day, also normal. So both the panel and the battery check out fine on their own; neither is the fault.
The Bluetooth pairing itself also turned out to be broken: it connects, climbs to 95%, then loops back and restarts the pairing instead of finishing. There’s a firmware update pending, but installing it doesn’t fix the behavior. Between the confirmed-healthy panel and battery voltages and the broken pairing, this points squarely at the controller itself. I haven’t swapped it out yet, but at this point I’m confident it’s the controller that’s failed, not the panel or the wiring.
Conclusion
Three things let you isolate most solar faults in a camper: the controller’s LED, its Bluetooth app, and a voltage measurement at the PV input.
If the controller connects over Bluetooth but doesn’t see the panel, look first at the panel, connectors, and wiring. If it won’t connect or power on at all, check the power coming from the battery. And if it sees the panel but production is very low, think shade, orientation, degradation, or a loose connection.
Measure before you replace anything — it can save you a fair amount of money.
How do I know if the solar charge controller is broken?
If the controller won’t power on, won’t connect over Bluetooth, doesn’t detect the battery, or shows no voltage at the PV input despite the panel delivering correct voltage, the controller may be at fault. Check fuses, connections, and wiring before replacing it.
How do I know if the problem is the solar panel or the controller?
The most reliable way is to measure the panel’s voltage before it enters the controller. If the panel is delivering voltage but the controller isn’t detecting it, the fault is likely in the controller. If no voltage arrives from the panel at all, the fault is usually in the panel itself, its connectors, or the wiring.
Can a solar controller power on but still fail to charge the battery?
Yes. The controller can power on correctly and display information normally, but still fail to charge because of a misconfigured battery type, a panel with low production, a faulty battery, or an internal fault in the controller itself.
What voltage should arrive from the solar panel at the controller?
It depends on the panel, but a typical 12V panel delivers roughly 18–22V open-circuit in good sun. Much lower than that, and it’s worth checking the panel’s condition and its connections.
Can a bad MC4 connector stop the controller from charging?
Yes. An MC4 connector that’s poorly seated, corroded, or deteriorated can prevent power from reaching the controller correctly, resulting in zero or badly reduced charging.
Do I need to disconnect the panel to check the controller?
For some checks, yes. Measuring the panel’s voltage with the cables disconnected from the controller confirms whether the panel itself is generating voltage correctly, and helps you tell a panel fault apart from a controller fault.
[…] Often the panel itself isn’t the problem — it’s the regulator, the battery, or the quality of the connections. If you want to work through this systematically, I cover it step by step in Solar Charge Controller Not Showing Charge: How to Diagnose It. […]
[…] ¿Prefieres verlo en inglés? Aquí tienes la guía equivalente sobre por qué el regulador solar no muestra carga: Solar Charge Controller Not Showing Charge: How to Diagnose It → […]
[…] If the panel and wiring check out but the controller itself won’t push charge → Solar controller not charging […]
[…] Solar charge controller not showing charge […]